If you’re anything like me, you sure know that good landscaping can turn your garden from lifeless to enchanting and it’s not just the inside of your house that matters, don’t you agree?
A dry river bed, or a dry creek bed, is one of the most fascinating ways to add life to your garden. Not only do they look beautiful, but they also fix many garden issues, like poor soil and drainage problems.
I’ve found that building a dry creek bed can also be a great way to deal with dirt in your backyard (see more ideas here) or to re-use the rocks that you removed from your yard.
Whether you’re a DIY enthusiast or you prefer hiring a professional to do it for you, there are many dry creek bed landscaping ideas to choose from. If you’re looking for a little inspiration, you’ve come to the right place.
I’ve put together this article with amazing ways in which you can add a dry river bed to your backyard.
Looking For Help From a Professional Company?
If you’re looking for someone to help you with your landscaping, you can get a free quote from top local contractors here:
Get a free estimate >>>Contents
25 Beautiful Dry River Bed Ideas
Precious Pebbles
Gray Pebble Walk
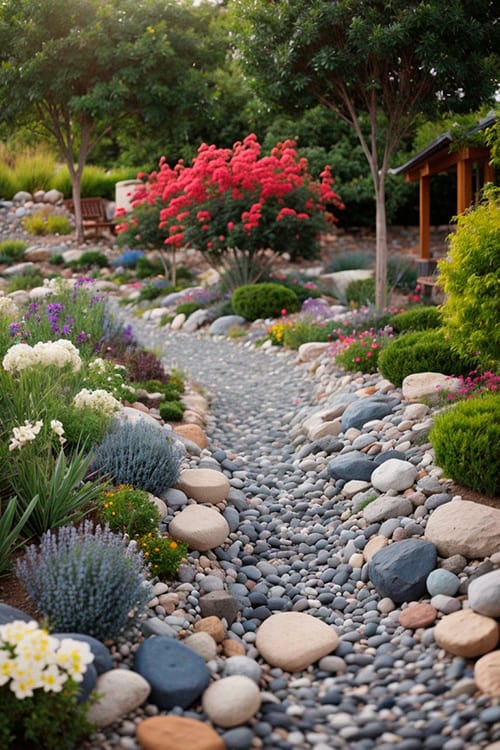
Pebbles are a classic choice when creating a dry river bed and dark and light gray pebbles contrast beautifully with green plants. I also like to place larger stones along the sides to define the riverbed. If you choose to go for dark-colored pebbles, make sure you add a few light-toned stones on the side, for a bright look.
Curvy Course
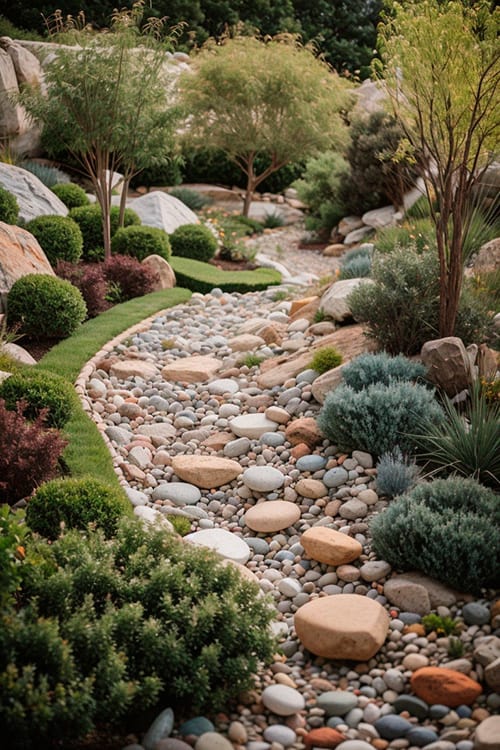
Pebbles are made smooth and round by the action of water, so they’re a perfect match for dry creek beds. You can use beige and white pebbles if you prefer lighter tones, and I love the way they contrast with the green grass around the dry creek river bed. You can also add black rock mulch to the mix!
Rocky Roads
Tan Cobbles
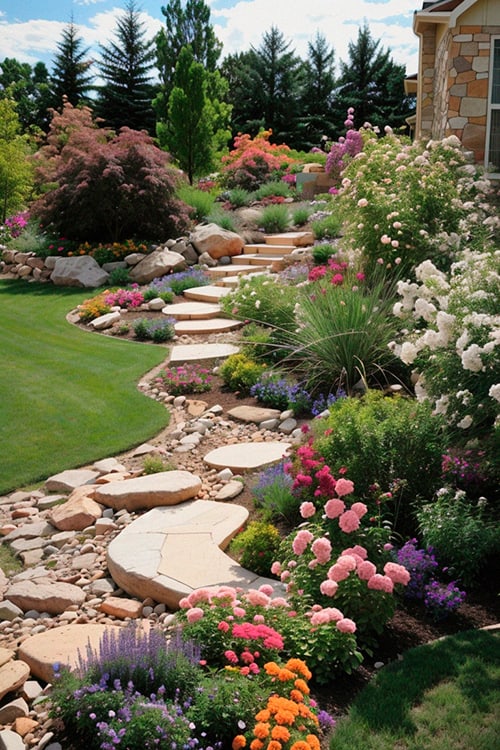
River cobbles come in many different sizes and shapes. When various stones are combined, they create a perfectly natural look. That goes double if you include some actual river rock.
If you’re aiming for a warm-looking dry creek, opt for a mixture of tan and gray rocks. I’ve also found that planting colorful flowers on the side makes for a picture-perfect dry creek bed.
Lush Green
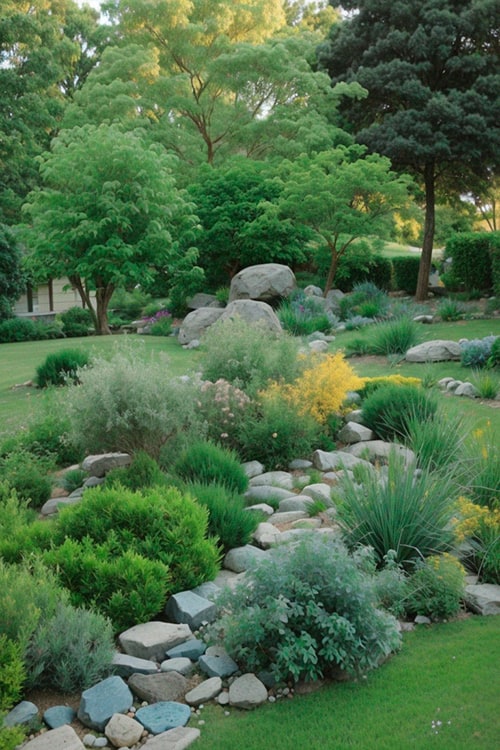
In my experience, nothing looks more serene than granitic rocks resting between green bushes. You can grow all different kinds of plants around the dry creek, depending on the weather conditions and nature of the soil in your garden.
Make sure you keep the dry creek bed, narrow with many plants on either edge if you want the grass and plants to dominate.
Rocks And Stones
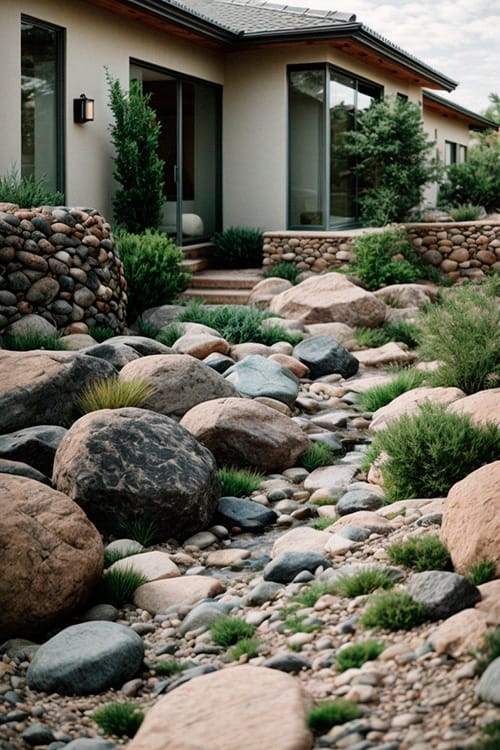
I have found that this type of dry river bed design is best used in larger yards. If you have a rather large backyard, you can try this layout using big, smooth rocks along the side of the river bed. Curve the path and then fill it with rocks and stones of different sizes and textures.
Blossoms All The Way
Flower Aisle
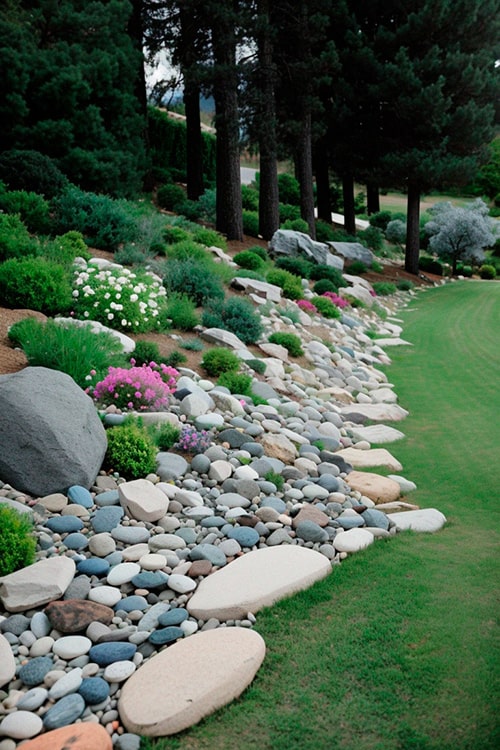
Nothing complements a blossoming flowerbed more than a dry creek bed. If your garden has flowerbeds, a simple yet charming dry creek bed is a great idea. I always make sure to use simple pebbles or rocks of the same color and size, so they don’t overshadow your flowers.
Rock Line
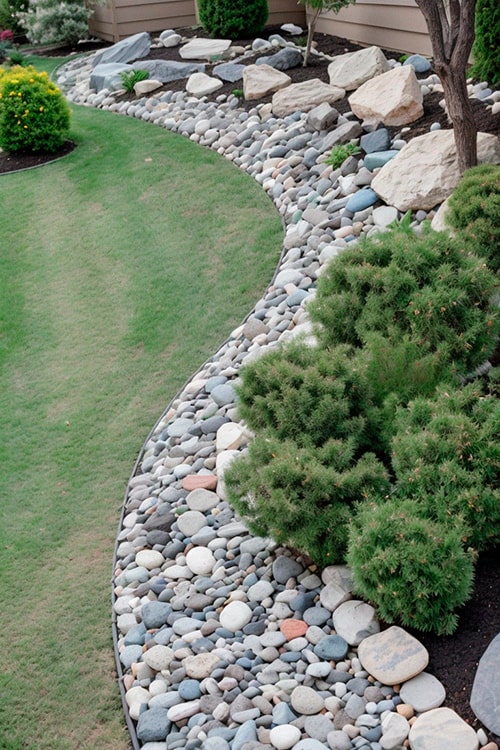
Looking to line your entire garden with a dry creek bed but don’t want to overdo it? I always go with a simple design like this one, with simple, neutral-colored stones. Use an assortment of small rocks and pebbles and line the river bed with larger stones.
Glass River Beds
Sparkly Garden
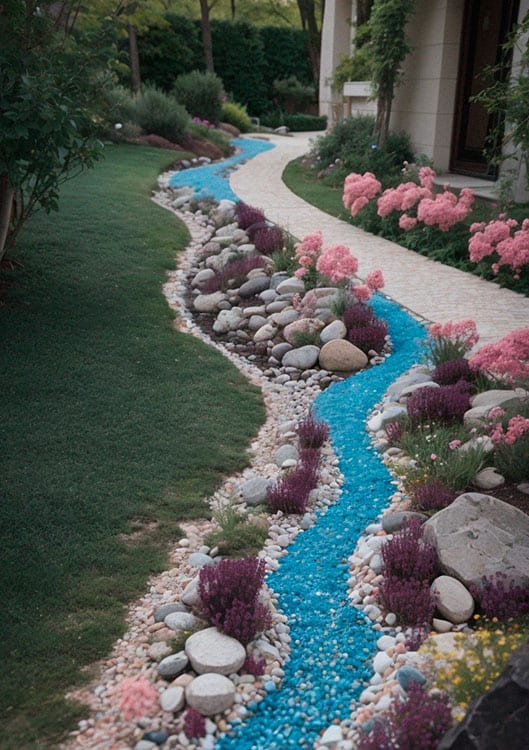
If you’re looking for a unique dry bed idea, this is the one. Use recycled colored glass pebbles to fill up your creek and line pebbles on the sides. I often like to add a fancy fountain along the way.
Blue Lake
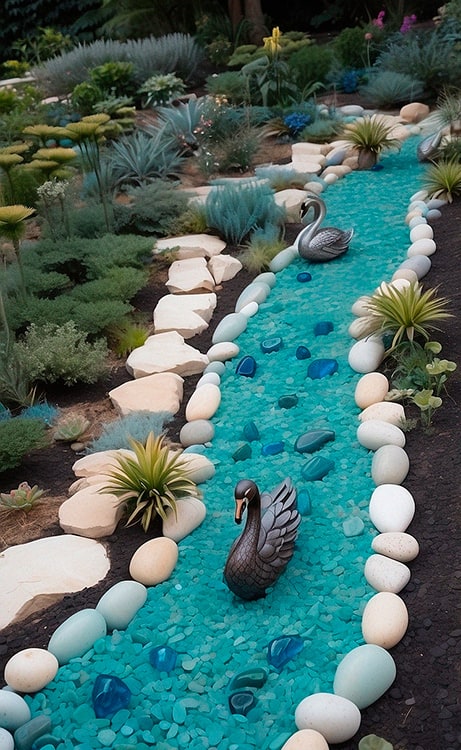
Missing the lake view? This dry river bed idea resembles a lake, by using two tones of glass pebbles and larger neutral-colored pebbles for the border. I even like to add a fake swan or two.
Blue Serenity
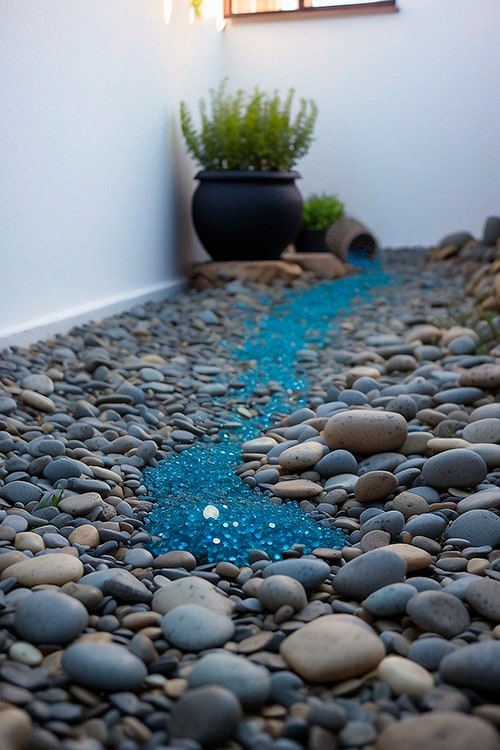
This simple dry river bed is so calming to look at. To get this look, place large pebbles along the border and smaller pebbles inside. On the corner, I like to add a statement pot and use blue glass pebbles for a flowing water effect.
Cross The River
Glossy Bridge
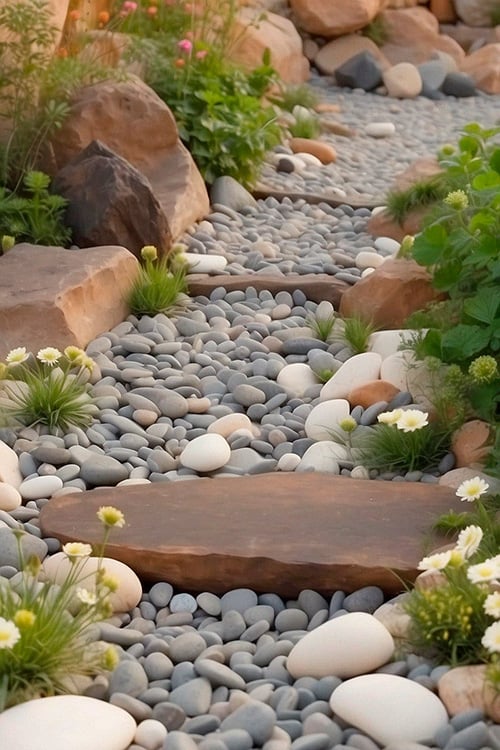
Another great addition to your dry creek bed is a bridge. Why not add a flat stone across your dry creek bed for an edgy look? I like to use pebbles to fill up the creek and add a unique river rock in a contrasting color.
Double Up
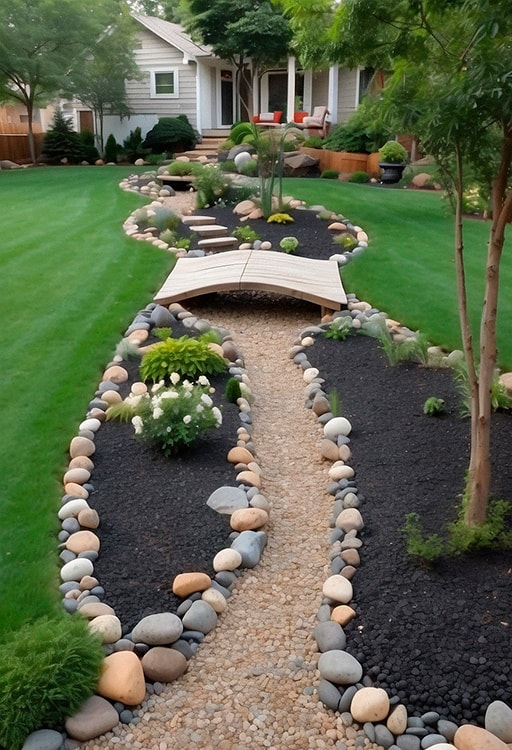
Why not make use of that extra space and build a long dry creek bed with bridges? Use dark mulch around the riverbed and add a few small, green bushes. Depending on how long the river is, I also like to add two or more wooden bridges along with the flat stones for extra bridgi-ness.
Broad Walkway
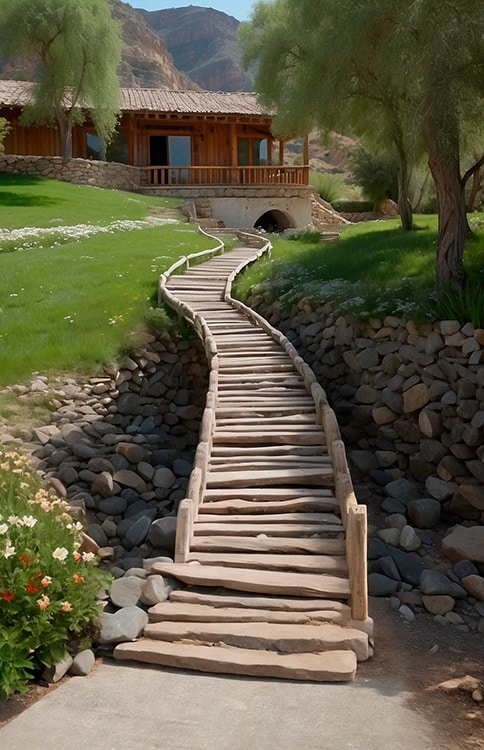
If you’re interested in creating a wide dry river bed, one of my favorite solutions is to install an overpass. This overpass will give your garden an authentic feel. Make sure you add a pop of color to your garden with flowers.
Wooden Bridge
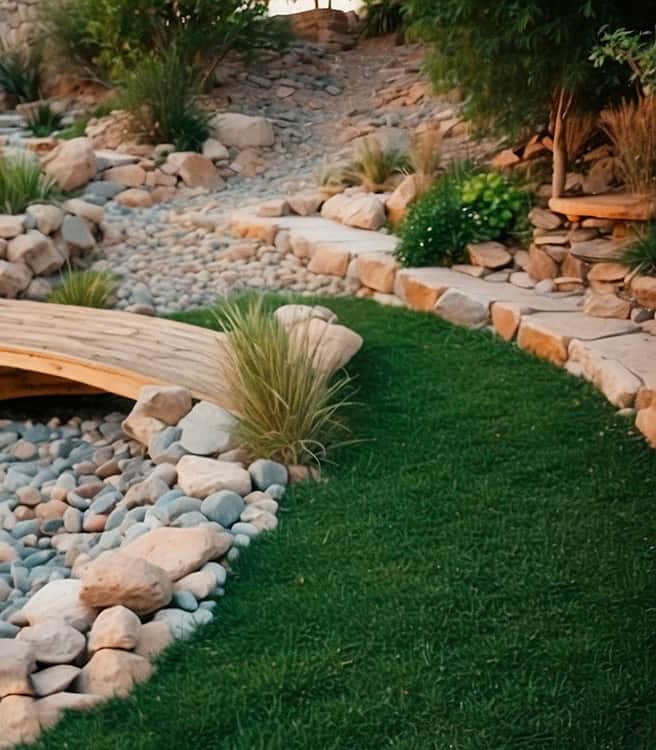
Incorporating a wooden bridge in your dry river bed is a great idea if you’re looking for a rustic look. Line your creek with large stones on the sides and smaller pebbles in the middle. The bridge and the bright grass are a brilliant match that always makes me ready for spring.
Classic And Elegant
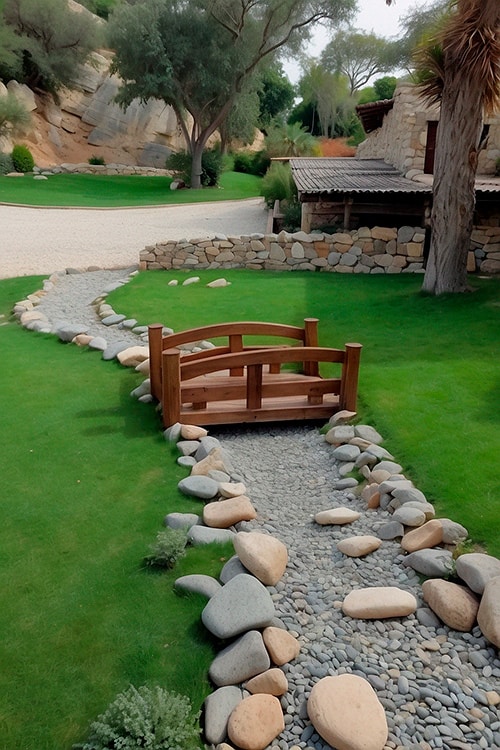
You can’t go wrong with a classic and elegant wooden bridge, and it’s one of my favorite backyard projects. To pull off this idea, all you need are a variety of stones and rocks and a wooden bridge. If you’re looking for an easy-to-do dry creek bed landscaping idea, this one might be what you need!
Pretty Pots
Pouring Pebbles
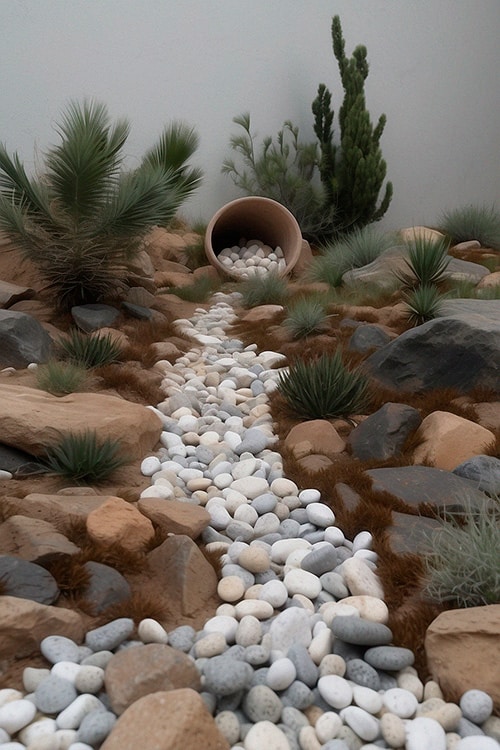
One of my favorite methods for easily creating an artistic display is to use a pot and some pebbles. Place a pot at the starting point of your dry river creek and fill it up with white and gray pebbles that trace all the way to the end.
Showy Shrub
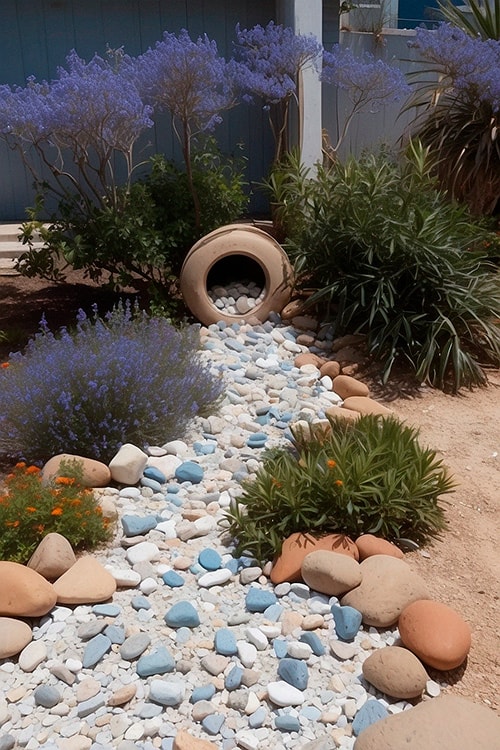
As if a dry river bed isn’t cool enough already! For this design, I like to plant a green, flowering bush that hugs a pot at the beginning of your creek. Use multicolor pebbles to fill the bed and line it with brown-colored stones.
Starfish and Succulents
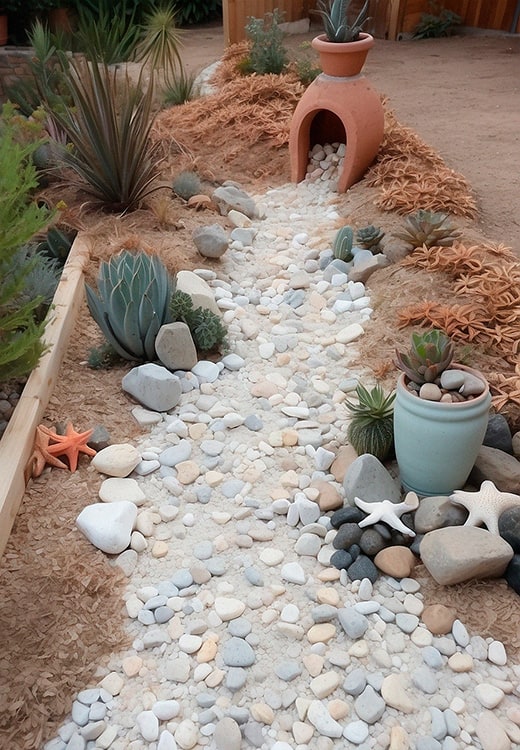
Who doesn’t like the thought of a mesmerizing beach? Bring that vibe into your yard with this idea. Place a pot with white stones at the end of the dry creek bed and scatter a few starfish. I find that using desert plants such as succulents and rocks on the side really make the white stones pop.
Into The Woods
Nature’s Log
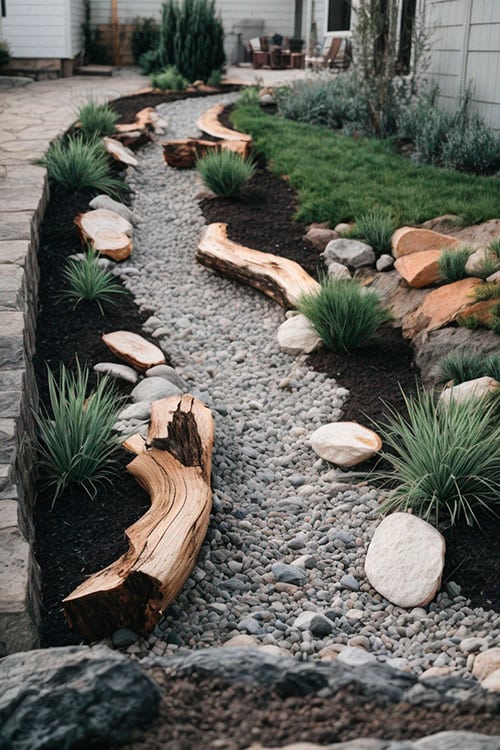
When I really want to make a statement in my backyard, this simple design is one of my favorites. Place tree logs on the side of your dry river bed together with cool-toned stones and rocks, for a nature-inspired look.
Woodland
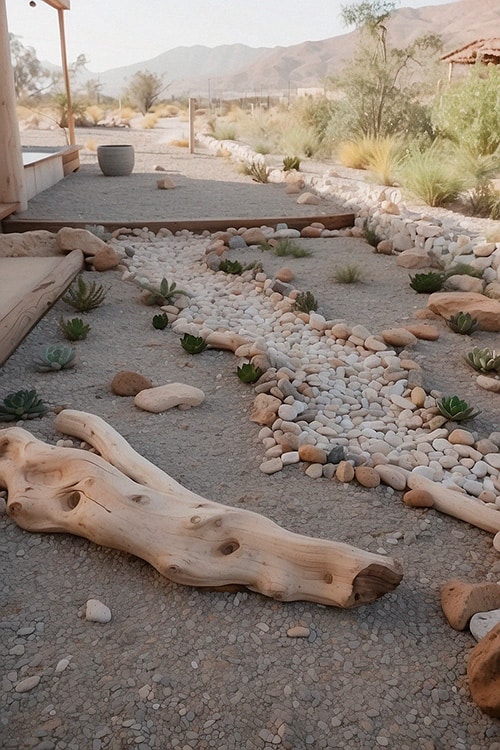
If you’re looking for an effortless dry river bed landscape, this is the one. Use up some empty space in your yard by filling it with small stones. Load your creek with some pebbles and line it with rocks. For an edgy touch, I like to place a piece or two of driftwood on the sides.
Stylish Stones
Rock River
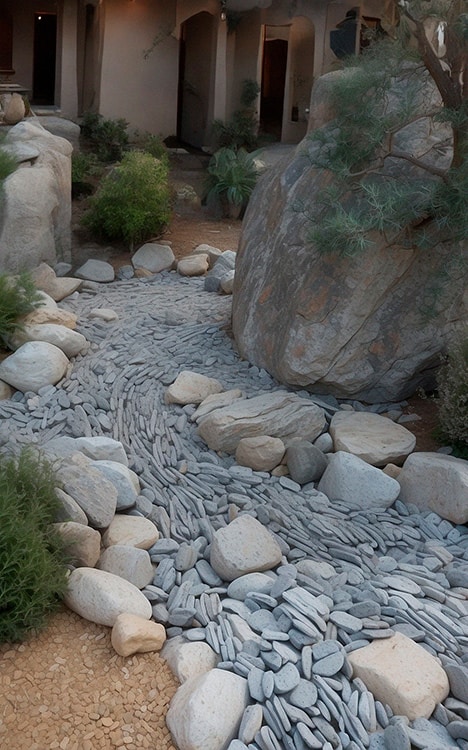
I have found that this river rock landscaping idea really appeals to minimalists. Who knew you could create a fabulous dry creek bed using nothing but stones? Perfectly arrange small stones in your creek for a flowing river effect and scatter a few larger rocks around for a natural feel. If you can get some actual river rock, that will make your project feel even more authentic.
Stunning Stones
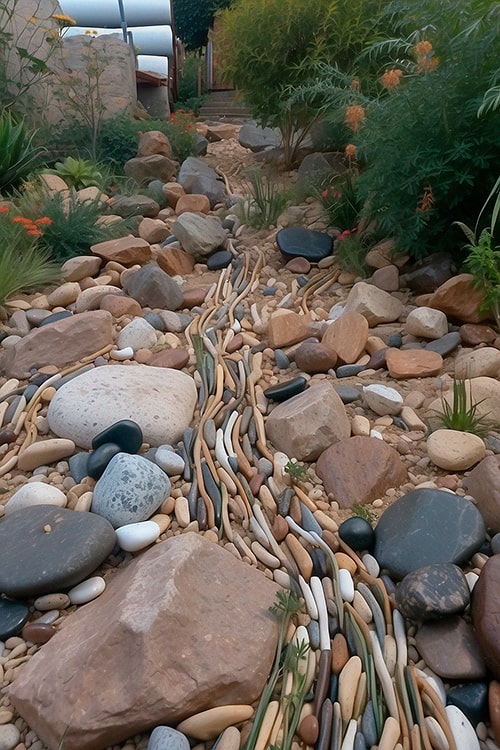
For this project, you’ll need stones in different shades of beige, gray, black, and brown, to achieve a flawless piece of art. River rock is a good choice for this project, too. I also like to line the dry creek bed with a few unique-looking stones to bring an artsy feel to my yard.
Cascading Rocks
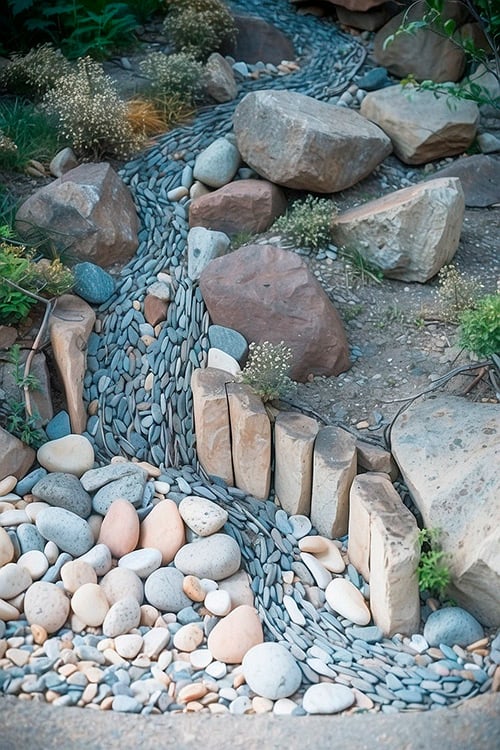
If a nature-inspired landscape is what you prefer, try creating a beautiful waterfall effect using stones on two levels. Place some log-shaped rocks or wooden logs (easier to source!) between both steps and pebbles along the side to direct the flow of the dry creek bed. I always feel like I’m on a forest trail when I build one of these beauties!
Garden Haven
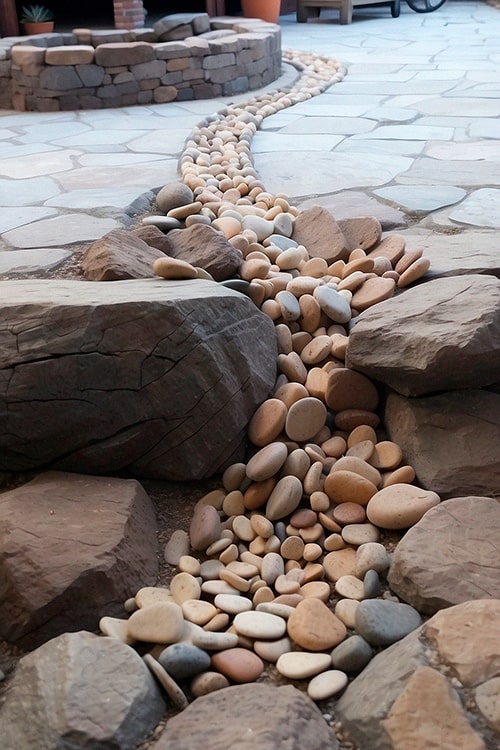
Who knew you could do so much with so little! When I’m working with a multi-level garden, one of my favorite tricks is to create a long, curved stone path through the dry creek bed using pebbles of various colors, ending in a pond-like stone arrangement.
Picture Perfect
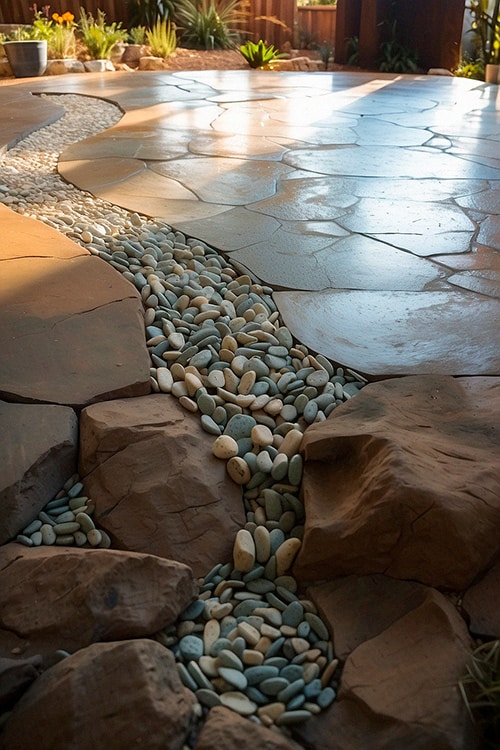
Your backyard doesn’t have to be green to be charming. Use stones to cover the ground and plan a path for your dry river bed. Fill it with dazzling stones in a matching color and you can even go the extra mile by creating a spiral of stones. Add some bigger rocks and you’re good to go. My friends who live in the desert love this design, and it also looks great in the winter.
DIY Guide For Dry River Bed
What Is A Dry River Bed?
A dry river bed is a trench or a gully lined with stones, rocks, and pebbles. It is surrounded by vegetation mimicking a natural riparian area, which the National Park Service defines as the land at the edges of creeks, rivers, lakes, and other bodies of water. Gardeners often decorate a dry creek river with logs, branches, clay pots, and even miniature bridges. I also like to spruce up my designs with my favorite plants and a variety of colored rocks.
A beautifully designed and adorned dry creek bed will instantly improve the curb appeal of your home. It will make it look exclusive and unique. On top of this, I have found that a dry creek bed will help you solve your lawn draining troubles.
A dry river bed, or dry creek bed, prevents rainwater from accumulating in one spot. The rocks disperse the water in different directions or direct it into a temporary stream. A dry creek river is a budget-friendly way to get rid of puddles in your backyard and stop the slow erosion of the landscape. I have saved a lot of money over the years thanks to the drainage my dry creek beds have provided!
How To Make A Dry Creek River Bed?
Planning
First, you will have to precisely plan the layout of your dry creek river. I recommend you take a good look at your yard, study its curves, and watch how the water flows when it rains.
Decide where you want to direct the water. It is best if you drain it into a drainage system that’s on your property, like a French drain or a channel. Don’t divert the water into a public street or towards your house, your shed, gazebo, or any other structure, for that matter. I can tell you from first-hand experience that doing that only leads to trouble: with your neighbors, the city, and even your foundation.
How To Do It
It will take about 8 hours
Follow these steps to make a dry creek river bed.
- Excavate the site
Using a strong digging shovel, dig out 12 to 15 inches of soil. If you are making a large dry creek bed, I recommend you check into renting a backhoe to cut the manual work.
- Flatten the surface
Compact and flatten the soil using a manual tamper. Don’t forget to angle and smooth the sides, as well.
- Lay the landscape fabric
Carefully lay the landscape fabric over the entire trench, even the sides. Secure it in place with sod staples. I have found that a piece of landscape fabric will prevent the stones in your dry creek bed from moving and weeds from growing. - Lay gravel
Cover the bottom and sides of your creek bed with ½ inch thick layer of crushed gravel. You can buy it in a store or get it from your local riverbank, though I recommend you check with local authorities before taking anything from a riverbank.
According to Christopher DeFeo, our landscaping stone specialist, “crushed gravel is seen most commonly in more natural landscapes.” - Define the edges
Place the rocks of various sizes along the edges of your dry river bed. I like to create a single row of stones or create a more defined border with multiple layers. Get creative and use my listed ideas as inspiration.
- Decorate
Decorate your dry creek river with shrubs, flowers, succulents, or other plants that reflect your style. Complete the look with potted herbs, a few unique rocks, or an old dried branch that tells a story. I always try to personalize my dry creek bed in some way, especially if it’s in my own yard.
This YouTube tutorial will help you visualize the process of making a dry river bed. Check it out!
Final Thoughts
Did you enjoy this article and checking out some of our favorite dry river bed or dry creek bed landscaping ideas? With so many ideas, it’s the perfect addition to any backyard or patio and can be implemented in so many ways to reflect your own style.
We hope we’ve helped you find some inspiration, let us know your thoughts in the comments and feel free to share this article with your friends!

Great ideas and directions. Glad I came across these ideas!
Got some nice ideas to consider… Glad my current “creek” is only about 10 feet long, though! After seeing the video… I think I’m still going to hire someone else to do the hard work, digging and lifting, for me!
Great and creative ideas! Love the variety and tips! Thanks!!
Great examples, loved the step by step tutorial. Putting together several of the ideas to make mine!!
Wonderful Ideas!!! Thank you!