Fall is the time when you should get prepared your house for the upcoming season by doing winterization of your house.
The last thing you want is to be calking your windows from outside when it’s just above 20F and snowing. Even worse is having your pipes or sprinkler system burst because you never managed to insulate and blow through the system before freezing weather come in.
By following our ultimate guide now before the cold arrives, you can save money and remain warm and safe throughout winter.
Contents
- 1 How to use our ultimate guide
- 2 Plan your winterization
- 3 Weatherization financial aide
- 4 Heating Winterization
- 5 Pipe preps
- 6 Windows and doors
- 6.1 Check for air leaks
- 6.2 Remove door drafts by weatherstripping
- 6.3 Seal leaks in your windows
- 6.4 Replace cracked glass in windows
- 6.5 Have wooden windows? Check for rot or decay
- 6.6 Add plastic film or bubble wrap to the windows
- 6.7 Install storm windows and (maybe) doors
- 6.8 Protect basement window wells
- 6.9 Consider using window treatments
- 7 Other indoor winterization preps
- 8 Fix the roof
- 9 Backyard and garden
- 10 Do winterization yourself or hire a professional?
- 11 Prepare for emergency
- 12 How To Winterize A House: Final words
- 13 About The Author
How to use our ultimate guide
We put a lot of hard work in collecting as much information about how to winterize a house as possible in this guide. This is why it is called the Ultimate Guide. We understand that having access to so much information may be intimidating at first.
No worries! We prepared a few guidelines that should help you to use our guide in the best and most efficient way:
- In the previous paragraph, take a look at the table of contents that gives you an idea of how our guide is organized and what it covers
- Study it and decide what areas of your home need to be winterized
- Each guide section has a video and a list of links that go deeper into the section topic
- Watch the video and read the links
- Before jumping on winterization tasks, prepare a plan as we suggest in the section right after the table of contents
Plan your winterization
Winterizing your house inside and outside can be a large project.
To avoid missing essential steps and overspending, make a winterization plan that will include all the work you plan to do and how much it may cost:
- go around your house and make a list of tasks you need to do inside
- go outside to your backyard and make a list of tasks you need to do outdoors
- make a list of the materials you will need
- check the available financial aide for winterization projects in the section right after this one
- decide which tasks you will perform yourself and which ones you will outsource to a contractor
- based on the task split and the available aide, budget the winterization expenses
- choose the contractor and call them to schedule the checks in time
- plan your time for the tasks you will do yourself to make sure you do the urgent ones first
- read and watch our guide
- do it!
Start doing your planning early.
It may help you to reduce delays and final cost.
You might be surprised but sometimes, it even makes sense to start doing it in summer. This is what is suggested by the industry professionals such as professional property managers. After all, they know the best how to maintain a property in winter!
To get an idea on how you can organize your own winterization (or weatherization) checklist, check out the links below:
- PDF – Before Winter Checklist
- PDF – Building Checklist
- Your Winterization Checklist – Preparing for Winter
Weatherization financial aide
After preparing the plan, you can now check what financial help is available in your area and how it can save you money. It can be a weatherization or insulation program that is run by your local government or a federal tax credit.
In order to find out what you are eligible for, read the information below and check the links.
Federal tax credit
EnergyStar says that:
Under the Bipartisan Budget Act of 2018 which was signed in February 2018, a number of tax credits for residential energy efficiency that had expired at the end of 2016 were renewed.
To see what tax credits are available, check the FAQ page “What Tax Credits Are Available?”
Local programs
Households (both low-income and regular income) can qualify for an average of $6,500 worth of weatherization improvements to their homes through government programs administered by each state.
Find out about your state’s program by checking the Database of State Incentives for Renewables & Efficiency®. Here’s what you can get in a nutshell:
- Weatherization programs can offer free weatherization services to residents who meet income qualifications.
- Insulation programs may reimburse you for 100% of the cost, up to $1000 for highly efficient and/or updated insulation.
- Additionally, low-income households can qualify for an average of $6,500 worth of weatherization improvements.
This is how to find the information you need to know:
- Go to the Database website
- Click on Filter
- Click on Category and choose Financial Incentive
- Click on State and choose your state
- You will see the list of all programs available in your state
- Look for everything that includes words residential, personal, etc
Heating Winterization
The time to turn heating on depends on the seasonal temperatures in your area and usually, it happens in the middle or the end of fall. Thus, the time to check it usually arrives in the beginning of fall.
Let’s see what needs to be done to make sure you stay warm during the cold season.
Boiler
Do you have a boiler? if so, you need to inspect and test it before turning it on to avoid unpleasant surprises.Here’s how you can do it.

More links on the same topic:
- Video – How to prepare your boiler for winter
- What Should a Boiler Inspection Include?
- PDF – What Should a Boiler Inspection Include?
- The Importance of Boiler Inspections
Water heater
Do you have a water heater? If so, it should be also prepared for winter. It may save you money on that winter elecricity bill and prevent from potential troubles.
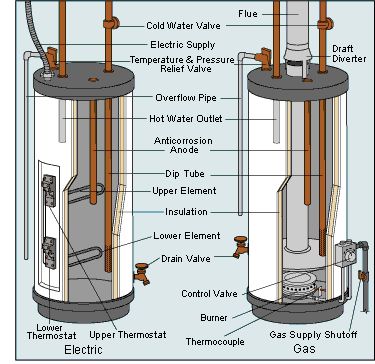
Turn down your water heater
Many conventional water heaters are set to 140 degrees Fahrenheit by manufacturers and installers. However, most households don’t need that high temperature. Consider lowering it to 120F (or lower) to reduce your water heating bill. Lowering it by 20F will save you about 6-10% according to Energy Savers.
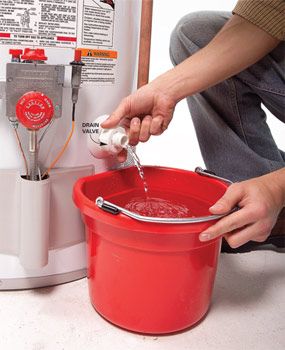
Flush the water heater
Particles and sediment can collect over time in the bottom of your water heater. While sounding pretty innocent, it can hinder its efficiency. To make sure your heater keeps functioning at its best during the cold months, flush the water through the drain valve to clear out the material.
Insulate your heater
According to the Department of Energy (DOE), insulating your hot water heater reduces your water heating bill by 4% to 9%.

More links on the same topic:
- How to prepare a tankless water heater for winter
- How to Winterize Hot Water Heaters
- How to Winterize Your Water Heater
Fireplace
If you have a fireplace, you need to inspect it before the cold weather strikes. Whether you plan to use it or not, you need to make sure it is prepared for the season.
Plan to use the fireplace? Check these bricks and joints
If you plan to use the fireplace, inspect mortar between bricks, tuckpoints, and firebricks.
If you see any open mortar joints or cracked bricks, you need to have them repaired immediately! A fire can easily spread into the stud wall behind the masonry firebrick through such holes and cracks.

More links on the same topic:
- How to Fix Mortar Gaps in a Fireplace Fire Box
- Masonry: How to Repair Mortar Joints
- ll You Need to Know About Tuckpointing
- Video – Easy Tuck Point Using a Masonry Grout Bag
How about switching to wood stove?
Is your fireplace a wood burning one? Did you know it is considered to be an inefficient source of heat that can also affect your health? Given all this, you may want to consider switching to an energy efficient wood stove.
United States Environmental Protection Agency (EPA) suggests to buy an EPA certified one for increased efficiency.
Just to make sure you are not using wood that is unsafe to burn, which is usually treated wood. This is how to tell if wood is safe to burn.

More links on the same topic:
- Add a Wood Stove for Energy Efficiency
- Replacing a Traditional Fireplace with a High Efficiency Wood Stove Insert (My Home)
- PDF – Installation of Wood Stoves in Fireplaces
…Or considering a fireplace insert?
Instead of a wood stove, you may consider getting a fireplace insert.
Fireplace insert gets installed (or inserted) into an existing fireplace just like a wood stove above can be. The inserts can funtion on various fuel including electricity, alcohol gel and gas, which is the most popular option.
The advantage of a gas insert is that the inserts are a low-cost option compared to installing a gas fireplace from scratch while having the same advantage of saving you energy on heating.
More links on the same topic:
- Fireplaces vs. Fireplace Inserts
- The 3 Best Choices to Replace a Wood-Burning Fireplace
- Cost to Convert a Wood Fireplace to Gas
- How to Convert Your Wood-Burning Fireplace
- Upgrade and Save Energy with Fireplace Inserts
Don’t plan to use the fireplace at all? Add glass doors
If you do not plan to use your fireplace during the cold season, you should make sure it won’t become a source of heat leak. To prevent that, you can add glass doors and maybe a piece of fiberglass insulation that can be stuffed behind the glass doors for extra insulation.

More links on the same topic:
- 5 Great Reasons to Add Glass Doors to your Fireplace
- how To Measure For Fireplace Doors
- 5 Benefits to Adding a Glass Door to your Fireplace
…Or seal it off altogether!
Instead of adding glass doors to your unused fireplace, you can choose to seal it off. This is a more permanent fix than just adding glass doors but energy-saving benefits will also be higher.

More links on the same topic:
- Sealing A Drafty Fireplace (That We Do Not Use)
- How to Seal an Unused Fireplace and Save Money on Heating Bills
Chimney
Chimney is a pipe through which smoke and hot air from into the air and is located on the top of your roof. It is an essential part of your heating system and requires regular maintenance and check-ups.
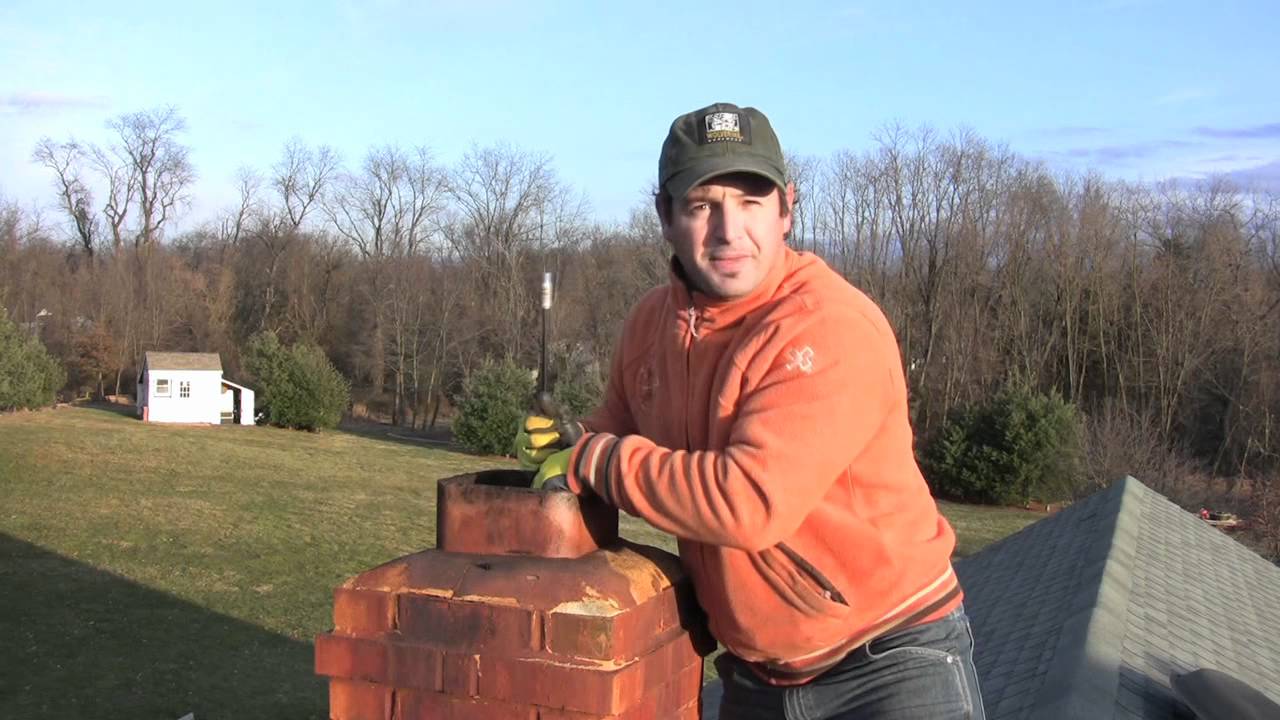
Clean your chimney
Before you use it on the first cold night, you need to have your chimney cleaned.
It can be done by a professional and it can also be a DYI project if you are comfortable with going up on the roof and performing it yourself. if you decide to hire a professional, keep in mind that chimney cleaners are usually busy during the fall and winter months, so it’s better to call early before the cold season comes.
Cleaning chimney does not only increase efficiency of your stove or fireplace, it also adds safety: Dirty chimney with a build-up of deposits and animals nesting is fire hazardous and it makes it unsafe to use.
More links on the same topic:
- How to Clean Chimneys
- Cleaning tips for a wood-burning fireplace chimney
- How to Clean a Chimney
Check chimney draft
In this test, you will make sure the chimney will draw up the fire and smoke properly.
It is easy to do by having a few sheets of paper and some thin pieces of wood. Follow these steps:
- Put the fireplace damper in the open position
- Make a small fire out of wood pieces and keep it up for a couple of minutes to warm up your chimney
- Roll the paper sheets up
- Light them in the fireplace
You should see the smoke rising up the chimney. If it doesn’t, you have an obstruction and need to call a professional in to clean the chimney.

Not actively using it? Plug it up!
If you plan to not use your fireplace and chimney often, plug it up with a chimney balloon. It will help to keep drafts out and heat in! it won’t take much time but it is very efficient. Just don’t forget to remove it before actually using your fireplace!

More links on the same topic:
- Video – Chimney balloon alternative
- How to Block Cold Air From a Chimney
- 10 Advantages of Using a Chimney Balloon
- Which is better: chimney sheep or chimney balloon?
Furnace
If your primary heat source is a furnace, you definitely do not want to put it at risk by not preforming winter-is-coming checks and tests.
If you consider buying a new furnace, be sure to take advantage of federal tax credits, which can cover 10% of cost up to $500 or a specific amount from $50 to $300.
Replace furnace filters
A common recommendation on changing your furnace filters is doing it once per month. However, that depends on may depend on your furnace and the type of filter you are using.
You can consider switching to a permanent filter, which will reduce waste and hassle. You just need to clean it once in a while and it will definitely save your money since you won’t need to buy new filters anymore.
Also, a good permanent filter may make the air in your house cleaner.
Did you know that disposable fiberglass filters catch only 10 to 40% of debris? On the other hand, permanent washable electrostatic filters can trap more than twice as much debris, up to 94%. They are much better at suppressing the bacteria, mold spores, viruses, and pollen that can cause illness and allergy.
Another good alternative to regular disposable filters is a HEPA filter. Such filters can remove more than 99% of airborne particles.
However, be aware that you cannot use such filter with a furnace directly. The furnace does not produce an airflow that is strong enough to go through the density if a HEPA filter. You will need to install a separate air filter in your home that utilizes HEPA filtration.

More links on the same topic:
- How to Replace Furnace Filters
- Do Electrostatic Air Filters Work? The Pros and Cons of Washable Furnace Filters.
- Whole House Air Filters: Comparing HEPA filters, electronic air cleaners, UV lamps, and 5″ filters
- Electrostatic Air Filters Vs Regular AC Filters
furnace heated by water?
Is your furnace heated by a hot-water radiator system? Bleed the valves by opening them slightly and when water appears, close them. Once in a while, consider flushing your system to clean the pipes up and to improve the flow of water.
Clean and Clear The furnace
Clean the furnace inside by opening it and vacuum-cleaning its guts. Remove all flammable materials away from the furnace before lighting it up for the season.

More links on the same topic:
- Two Tips to Improve Furnace Efficiency
- Six Tips To Winterize Your Furnace
- How To Prepare Your Furnace For Winter
Radiators
All the preps you did with the system producing heat in your house won’t be enough if you neglect taking care of the radiators, the system that distributes the heat inside your house.
prep your radiators
To not hinder the efficiency of the radiators, you should avoid placing large pieces of furniture in front of them. Do it at least in the short-term for the cold season. Otherwise, it will be your sofa and not you getting all warm and cozy in winter.
Don’t forget to clean the radiators. Keeping it clean is a simple way to improve their efficiency.
If your radiators are water-based, bleed them to remove air from the system. This will increase the overall efficiency of the heating system and will distribute the heat more evenly in the house.

More links on the same topic:
- PDIY: Prepping your radiator heating system for winter
- Why Should I Keep My Radiator Clean
- How to Clean Radiators
Use tin foil behind radiators
One way to prevent unnecessary heat loss from radiators, particularly on those attached to external walls, is to use heat reflective aluminium foil behind the radiator. This prevents heat disappearing through the wall by reflecting it back into the room. You can even find foil that is specially designed for the purpose.

More links on the same topic:
- Can I Save Money On My Energy Bills And Keep My Home Warm By Putting Tin Foil Behind The Radiators?
- Maintenance Tips: Foil Wrapping Behind Radiators & Other Methods
- On The Money? Revealed If Putting Tin Foil Behind Radiators Affects Energy Bills And Keeps Your Home Warmer
More on heating winterization
Here are a few more things you can do to make your heating efficient in winter:
- clear obstacles to heating vents and clean them inside so the air can flow freely
- turn the thermostat down; according to ENERGY.GOV , turn your thermostat back 10-15F for eight hours while you are sleeping saves around 10% a year on heating
- …or get a smart one for hassle-free temperature management; just program it to a lower temperature during the night
- buy a fire extinguisher or replace an existing one if it is older than 10 years
- make sure you have enough fuel (wood, oil, etc) for your heating system if it is not electrical
- use an energy monitor that indicates household electrical usage in real-time and projects your monthly bill; it’s really helpful to identify the big energy leaks in your house
Pipe preps
Another important part of the process of how to winterize a house is taking care of pipes. Nobody wants to get their pipes frozen in winter. Follow our check-list to avoid that!
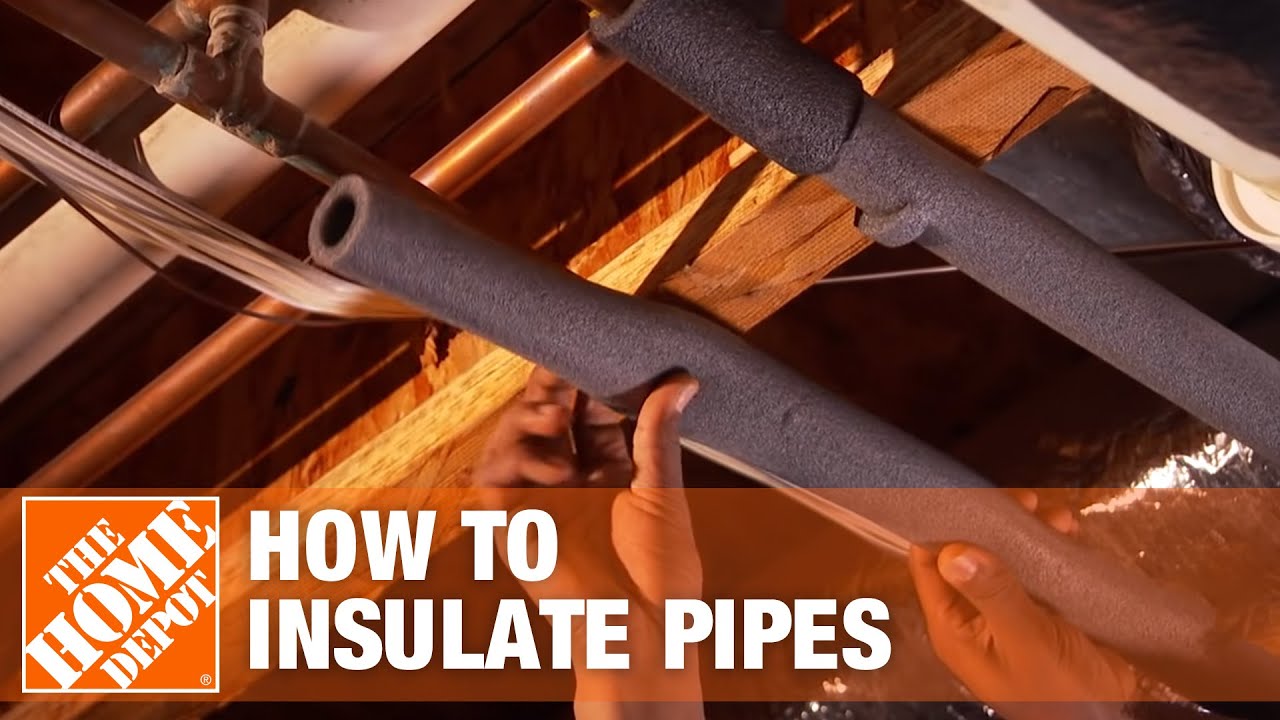
Make sure to insulate exposed pipes
If you have any pipes in un-insulated spaces, such as in a basement, crawlspace, attic, outside walls, etc., make sure they are insulated well to prevent freezing. Use at least foam insulation at a minimum and ideally, you should wrap the pipes with electrical heating tape first, then insulate them.
More links on the same topic:
- How to Insulate Exposed Pipes
- Insulate Your Pipes To Prevent Freezing
- Four Reasons To Let The Professionals Winterize Your Home Plumbing System
- What Materials Are Best For Pipe Insulation?
Also, insulate your internal water pipes
Touch your pipes to check if they are warm or hot. If so, they are good candidates for insulation. You can use pipe wrap for shorter tubes and tubular sleeve for longer ones.
According to the Department of Energy (DOE):
Insulating your hot water pipes reduces heat loss and can raise water temperature 2°F–4°F hotter than uninsulated pipes can deliver, allowing you to lower your water temperature setting.
This helps you save money on heating and also preserve water since you won’t need to wait for long to get hot water.
Identify any “problem” pipes that are prone to freezing in the house and consider using heat tape to keep them warm during extremely cold weather

More links on the same topic:
- How to Wrap Pipes for Cold Weather
- 8 Tips To Prevent Frozen Pipes
- Ask Pablo: Is It Really Worth Insulating My Pipes?
Windows and doors
You can use caulk, insulating foam and weather stripping to seal cracks around door frames and windows. According to Energystar.gov, homeowners typically save up to 20% a year on energy costs by sealing air leaks.
Check for air leaks
Before doing anything, you need to find out where exactly your windows and doors have air leaks.
On a day when it’s windy outside, close your windows and doors and move your hand along the windows and doors to check for air leaks.
You can also use an incense stick. Watch the smoke trail going up, and if it shifts to any other direction, you have an air leak. Typically, you can air leaks at the edges where the window or door is hinged but it can also appear in other places if your window or door has cracks.

More links on the same topic:
- Detecting Air Leaks
- How to Check Your Windows and Doors for Costly Air Leaks
- How to Inspect Windows and Doors to Stop Air and Water Leaks
Remove door drafts by weatherstripping
If your doors are drafty, remove the leaks by weatherstripping on the side and bottom of the doors. Install weatherstripping on any leaking doors. According to the U.S. Department of Energy, drafts can waste 10% to 20% of your energy use.
To fix a door draft under your door, you can simple with adopting an old Great Depression fixture, the draft snake. It’s easy to make it yourself: Just place a rolled bath towel under a drafty door!

More links on the same topic:
- How to Stop Door Drafts Around Entry Doors
- Sock It To Your Energy Bill! Make Your Own Draft Stopper!
- 20 Adorable DIY Draft Snakes Fight Chills
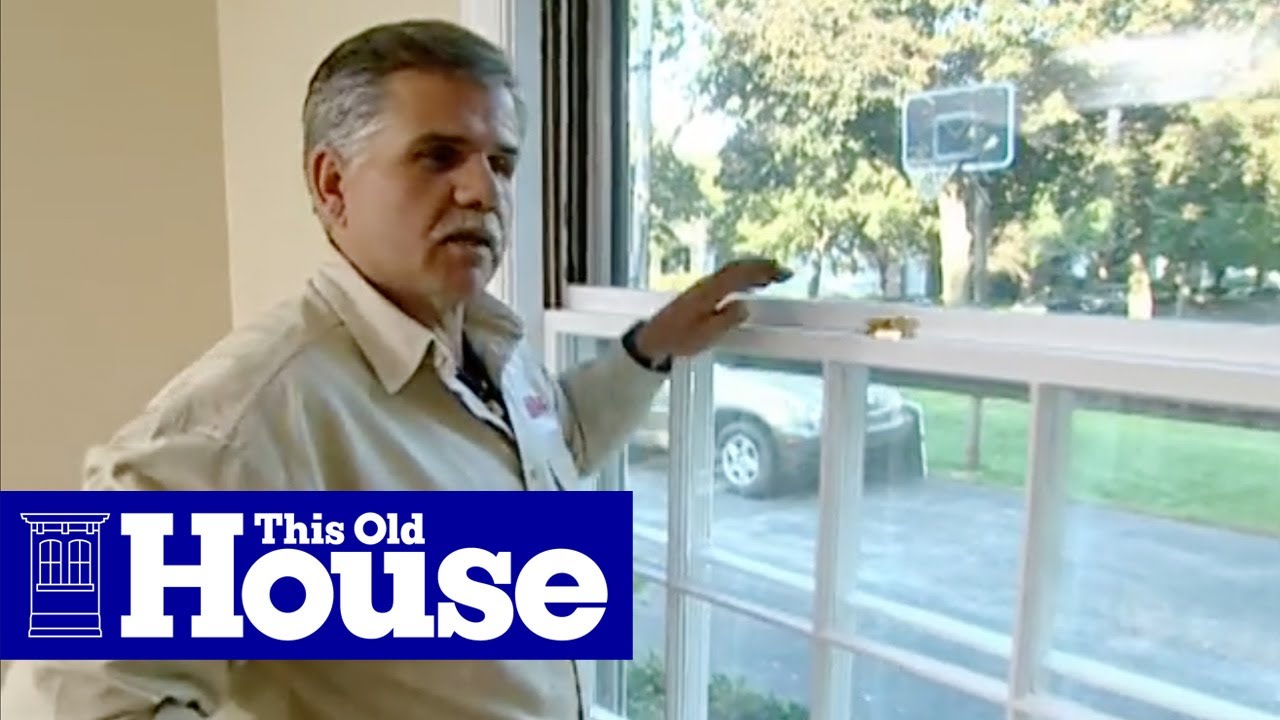
Seal leaks in your windows
According to the U.S. Department of Energy, sealing drafts can save you 10%-20% annually on your energy bills. For windows insulation, you can use inexpensive rope caulk.

More links on the same topic:
- How to apply caulking
- Why and How to Use Rope Caulk at Home
- How to Put Rope Caulk Around a Window
- How to Seal Air Leaks Around Doors & Windows
Replace cracked glass in windows
Check the glass in your windows and replace it if it is cracked or broken. If you end up replacing the entire window, prime and paint any exposed wood.

More links on the same topic:
- The Best Way to Fix a Glass Window Crack
- How to Replace Broken Window Glass
- How To Paint Wooden Window Frames
Have wooden windows? Check for rot or decay
If you have wooden window frames, it is important to regularly check them for signs of rot or decay. If you see any, repair or replace framing to maintain structural integrity. it is better to do it before winter since the water that spring will bring may worsen the condition.
More links on the same topic:
- Timber – Rotting Problems
- How to Repair Rotted Wood on an Exterior Window Frame
- How to Repair Dry Rot in a Window Sill
Add plastic film or bubble wrap to the windows
For just a few dollars, you can get a window insulation kit at your local hardware or dollar store. it’s cheap and properly installed window plastic is pretty much invisible.
The bubble-wrap is another way to insulate your window. It will still allow light to come through and you’ll be saving some good chuck of warmth. Taping up bubble-wrap can avoid drafts which waste 5 to 30% of energy usage per year, according to the U.S. Department of Energy.

More links on the same topic:
- How to weatherize windows with plastic film insulation
- How To Install Window Insulation Film
- How to Bubble Wrap Windows for Winter Warmth
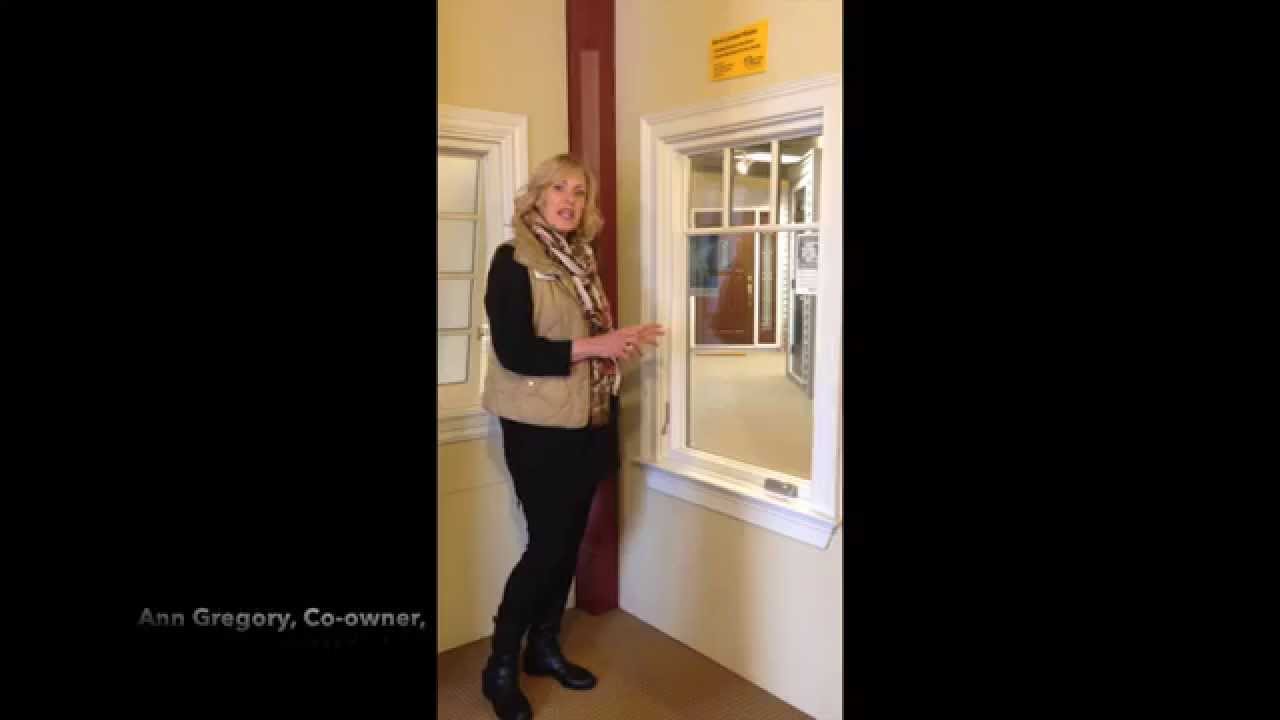
Install storm windows and (maybe) doors
Storm windows can make a big difference when cold winds start blowing. Installation process may be a bit difficult but it is well worth it to install them for the season.
According to Building America Solution Center, installing storm windows results in energy saving from 5% – 20% for a clear storm window to 12% – 33% for a Low-E storm window. The average payback of the installation costs is usually 2-4 years.
Several regional utilities offer programs with rebates and incentives for purchasing and installing storm windows. While some utilities may not specifically include storm windows as part of their incentive programs, they may include it under insulation or window categories. Ask your local utility about programs for Low-E storm windows and also check energy.gov.
Similarly, you can install a storm door in addition to your regular door. However, it seems that storm doors is not a very energy efficient improvement since the regular doors are already pretty efficient and do not lose too much energy.
More links on the same topic:
- PDF – Low-E Storm Windows & Panels: A New Tool for Utility and Weatherization Programs
- 5 Steps to Making Your Windows More Energy Efficient
- Storm Windows vs. Replacement Windows
- A Storm Door Is NOT a Wise Home Energy Efficiency Improvement
- Video – How to Install a New Storm Door in an Old Opening
Protect basement window wells
Does your basement have windows? Consider protecting the window wells by covering them with plastic shields.

More links on the same topic:
Consider using window treatments
To add an extra insulation layer to your windows, use thick window treatments.
According to energy.gov, some treatments like insulated cellular shades can save about 20% of heating energy. Meanwhile, most conventional draperies can reduce heat loss from a warm room up to 10% . With extra adjustments , it is possible to increase their insulation efficiency up to 25%.
More links on the same topic:
- Curtain Call For Cold – How to Use Curtains to Insulate Your Windows
- Use Window Treatments to Control Drafts
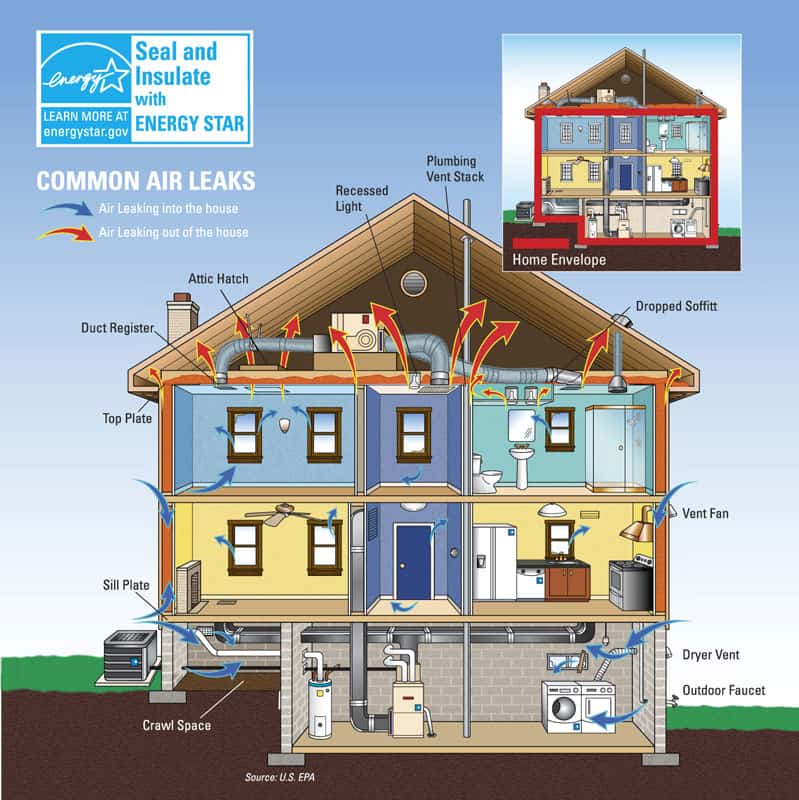
Other indoor winterization preps
If you feel cold air leaking in, this means that your warm air is leaking outside.
energystar.gov estimates that sealing the leaks around your home can help you reduce from 7% to as much as 20% off your heating and cooling costs depending on where your house is located. It means sealing and insulating makes your home more energy efficient.
Here is an image presenting air flow in a typical 2 store house with a basement. The arrows represent leaking air and show how much you can lose without proper insulation.
Seal the leaks you do not think about
Some of the areas of your home may be losing heat without you realizing it:
- check vents and other openings; make sure vents and other openings are closed and sealed tight for cold air infiltration.
- check central heating and air-conditioning ducts for air leaks; seal and insulate the ducts that are accessible to you, such as crawlspace, attic, basement, garage, etc.
- make sure to seal the connections at the vents and register as well; many utilities offer incentive programs for duct improvement – check what is available in your area here
- Insulate around basement doors, windows in unused rooms, window AC units; pack fiberglass foam around them – just remember to wear gloves when working with fiberglass, wear gloves to protect your skin!
For more detailed insulation guides, check out these links:
- Air Sealing Your Home
- PDF – DYI guide on sealing and insulating
- Insulation: A Smart, Behind-the-Scenes Investment
Insulate well the attic
Since an insulated house may lose 25% of its heat trough the roof, says Energy Savers, you may want to consider investing into the attic insulation.
To find out how much insulation you need (the R-value) based on your home state, use energystar.gov table. Most homes require R30 to R60 insulation in their attic.
Also, check to be certain that any water pipes or fire sprinkler piping installed in the attic are properly insulated above the piping with a continuous R30 rating.
What is R-value? According to Wikipedia:
The R-value is a measure of how well an object, per unit of its exposed area, resists conductive flow of heat: the greater the R-value, the greater the resistance, and so the better the thermal insulating properties of the object.
Insulate outlets and switch plates
Install foam-insulating sheets behind outlets and switch plates on exterior walls to reduce heat leaking outside.

More links on the same topic:
- Outlet Insulation Stops Cold Air Coming Through Electrical Outlets
- How To Insulate Outlets & Switches
- Do Outlet Gaskets Help Air Seal Your Home?
Moisture control
Controlling moisture can make your home more energy-efficient, less costly to heat and cool, and more comfortable.
Here’s a great infographic by www.ac-heatingconnect.com that shows why the moisture level is important:

How to handle moisture properly in winter:
- The 10 Must-knows About Moisture Problems
- Moisture Control
- Winter is in Full Swing—Are You Keeping the Humidity out of Your Home?
- Why Does Condensation And Damp Get Worse In Winter?
Run fans in reverse
Reverse your ceiling fan in winter to make it run at low speed in the clockwise direction.
This makes the warm air near the ceiling go down thus making the occupied space warmer. You will also need to adjust your thermostat when using the fan — this step will result in additional energy and dollar savings!
More links on the same topic:
- How to Save Energy by Correctly Operating Ceiling Fans in the Winter
- How To Properly Use Ceiling Fans During The Winter Months
Take care of the air: Breathe easy all winter long
Since your house is (or at least should be) tightly sealed in the cold season, it is important to pay attention to the air quality inside. Here’s a great infographic by nationalradondefense.com that shows what cam affect the air quality in your house:

Check for dangerous gases
The gases we are talking about are radon and carbon monoxide.
Radon is a radioactive gas that found naturally in the environment and has no taste nor odor. Humans cannot detect it using only their senses but it is dangerous for us.
Carbon monoxide is produced when fuel is burnt and also has no taste nor odor. It is dangerous for us as well. The level of the gases can increase during the winter months.
In order to stay safe, buy a radon test kit at a local hardware store and a carbon monoxide detector. Already have the detector? Change the batteries!

More links on the same topic:
- How to Test for Carbon Monoxide in Your Home
- Radon Rid Advises That Winter is the Best Time for Radon Testing and Radon Remediation
- The Importance Of Radon And Carbon Monoxide Testing
- How and Where to Install a Carbon Monoxide Detector
Prep your humidifiers
Make sure to clean your humidifiers including the whole house ones before the season starts. Don’t forget to replace the evaporator pad!

More links on the same topic:
- How to Clean Out a Humidifier
- Maintenance Tips For Your Humidifier
- Essential Whole-house Humidifier Maintenance Tasks
Let fresh air in
During the cold season, don’t forget to let some fresh air in. You can do it by simply opening the windows a bit or just not sealing your house too tight!
Check the following links for more details:
- Five Ways To Have Healthy Air In Winter
- 6 Ways to Ventilate Your Home (and Which is Best)
- Ventilation
- Winter Home Ventilation Considerations for Cold Climates
Fix the roof
Either hire someone to inspect the roof if you are not comfortable safely doing this yourself. If you are, you should wear well-fastened shoes with non-skid soles while inspecting it yourself.
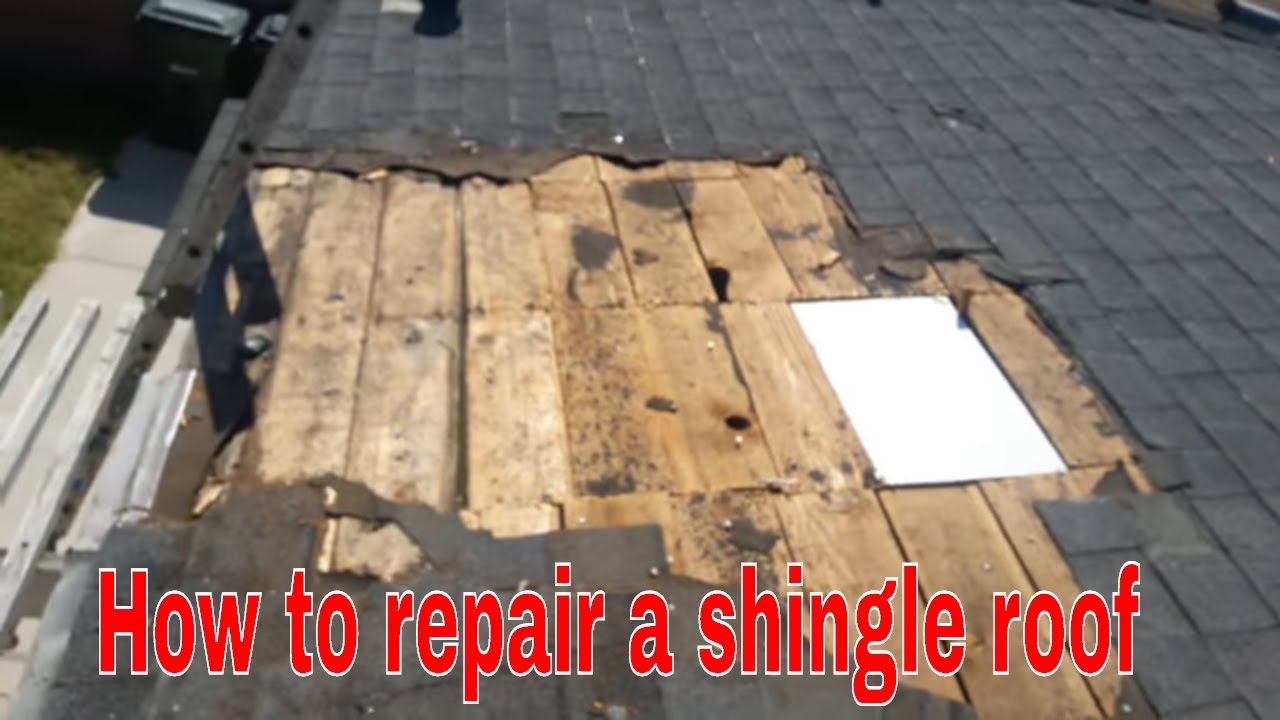
Check roof shingles
Check the roof for missing or damaged shingles and have them replaced.
More links on the same topic:
- How to Replace Damaged Roof Shingles
- Will Your Roof Leak With One Shingle Missing
- 5 Signs Your Shingle Roof Needs Replacing
Check flashing
Check flashing around chimneys and other roof objects since these are often the source of leaks. Have repairs made, if necessary.

More links on the same topic:
Clean rain gutters and downspouts
Clean out rain gutters and downspouts to avoid getting ice damps that prevent proper drainage.
Make sure gutters and downspouts are clean. If there are wet leaves remaining in the gutters over winter, it may add significant weight and volume to the gutter when frozen. Know that it increases the risk of damage to your gutters. If you have a trench drain system make sure to clean that as well.
If you have a hardtop gazebo with gutters, clean them as well.

More links on the same topic:
- How to Clean Gutters and Downspouts
- How To Unclog a Downsprout From the Ground
- Four Reasons Your Gutters’ Downspouts Aren’t Working
Cover roof vents and openings
Ensure all vents and openings are covered to prevent insects, birds, and rodents from getting inside during the cold weather.

More links on the same topic:
- Using Metal Mesh to Keep Pests out of Your Attic
- How to Prevent Mice from Entering Your Home
- 4 Areas in Your Home You Should Check for Rats
Backyard and garden
The backyard and garden areas is where you need to concentrate the most of your winterization efforts. After all, everything there is exposed to harsh weather!
Keep on reading to learn about our tips!

Outdoor pipes are must
One thing you should do to prevent getting frozen pipes in winter is to properly winterize your outdoor pipes. Here are the steps you should follow:
- disconnect garden hoses and turn off the faucet if you have a separate shut off for external faucets
- empty and roll up the garden hoses and store them inside
- cover garden hose reels
- drain the water from the faucets to prevent freezing
- winterize your watering wand; read more about it here
- wrap outside faucets and hose bibs with covers to prevent water damage; insulated covers slow the heat loss from a pipe as it goes through the wall out into the cold
- wrap outdoor pipes if needed
- caulk around any pipes entering your home
- don’t forget about fountains!

More links on the same topic:
- How to Winterize Your Outside Garden Hose Outlet Bib
- Winterizing Your Garden Hose Reel
- Prevent Frozen Pipes
- Winterizing Outdoor Water Fountains – The Ultimate Guide
Outdoor air conditioner winterization
Here are the steps to do in order to prepare your AC unit for the cold season:
- remove all water from inside; empty the AC pipes and make sure you don’t have excess water pooled inside the unit and turn the water shutoff valve if your unit has it
- clean the condensing unit and fan blades of debris by using a hose with the spray-head set to the highest pressure
- cover the condensing unit; if left unprotected, it can be damaged by wet leaves that may expand inside the unit during winter
- as for the window air conditioner, remove it from the window or cover it if it cannot be removed

More links on the same topic:
- How to Prepare an Outside Air Conditioner Unit for Winter
- How to Winterize Portable, Window, Split & Central AC Units
- Seasonal Air Conditioning Maintenance and Winterizing Tips
Check foundation
To prevent having problems in winter and especially in spring with floods and water infiltration, check you foundation before the cold season strikes. Also, you would probably want to keep rodents and pests away from your house; do it by fixing your foundation:
- rake away all debris and edible vegetation from the foundation
- ensure rain or snow drains away from the house to avoid foundation problems
- seal up entry points or cracks to keep small animals from crawling under and into the house; mice can slip through space as small as a dime
- inspect sill plates for dry rot or pest infestation
- secure crawlspace entrances
- inspect all basements and lower levels to ensure openings are closed and weather tight

More links on the same topic:
- Check Your Foundation Before Winter
- How To Protect Your Home’s Foundation From Water Damage
- How to Seal a Crawlspace
- Insect Identification, Infestation & Damage in Buildings
- Ask The Experts: Foundation, Drainage and Water Control
Swimming pool shut down
You obviously do not want your pool to be damaged during the winter so you should spend some time on winterizing it.
More links on the same topic:
- Closing an Inground Swimming Pool? How to Winterize a Pool for an Easy Spring Opening
- How To Winterize an Above Ground Pool Like a Pro
Hot tub: Do you need to winterize it?
If you do not plan to use your hot tub in winter, you need to winterize it to avoid damage to your plumbing.
If you do plan to use it, most likely your hot tub is designed for all-year use and the weatherization improvements are already included in its design. You do need to do winterization only if you plan to leave home for an extended period of time.

More links on the same topic:
- Winterizing Your Hot Tub (Why You Don’t Need To)
- How to Winterize Your Hot Tub (Or Is It Already Winterized?)
- Hot Tub Maintenance: How to Winterize Your Hot Tub
Getting ready for snow
Before a snowstorm strikes, you need to make sure you are all ready to fight it properly.
People often wait until the first big snowfall to do preparations and buy necessary crucial supplies. Stores often run out of them, especially if a big storm is on the way. So you should prepare now. While you still have some time left, do these preps:
- get yourself a snowblower that fits your weather; for example, get a good machine for wet snow if it’s your case.
- if you do have a snow blower, run a check-up: Fill it up with gas and start it up to make sure it works.
- stock up on ice melt
- sharpen ice chopper and inspect snow shovels to make sure they’re ready for the new season
- identify your snow removal vendor and make sure the contract is in place

More links on the same topic:
- Preparing Your Snowblower For Winter
- How to Choose Ice Melt
- 6 Important Tips To Safely And Effectively Use Ice Melt
- A Guide to Tool Sharpening Basics
- How to Choose Your Snow Clearing Service
Make your garden winter ready
In the garden area, you need to take care of water parts, plants, and outdoor accessories. Let’s look at each of these topics.
Lawn sprinkler system
Have your sprinkler system winterized no later than the end of October. Turn off the water supply and blow compressed air through sprinkler lines to remove water.

More links on the same topic:
Rain barrel And Diverters
Drain your rain barrels if you have any to avoid getting it damaged in freezing temperatures. Also, use this chance to clean it up before the next season.
Also, make sure that your rain barrel diverter is not clogged and does not have any water collected inside. If water freezes inside it, it can damage it.

More links on the same topic:
Trim trees (And Remove Them If Needed)
Before winter comes, prepare your garden for harsh season to avoid damages to plants and even house.
While it is not recommended to prune trees before winter, you still may want to do that. Large branches can potentially fall and knock out power to your home when the weather gets bad. To prevent iced-over or wind-swept branches from causing house damage or a power problem, trim overgrown branches back from the house and electrical wires.
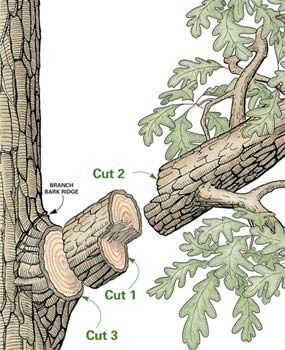
For small branches, you can use garden scissors or shears while for big ones, you will probably need a saw. Read this guide by anestwithayard.com about how to choose the best saw for cutting tree branches.
Check your backyard for signs its time to remove a tree. You don’t want a tree to fall during a winter storm and damage your property! Better to do preventive measures.

More links on the same topic:
- How To Trim Large Tree Branches
- How to Protect Your Trees from Winter Storms
- Why Do Trees Topple in a Storm?
Take care of your plants
If you want your plants to bloom and make your garden an eye candy next spring and summer, take care of them before winter comes.
It’s a big topic so here, you can find only some of the steps you should be performing; for more preps, check the link below the video:
- bring plants and flowering trees inside before the first frost comes and before temperatures dip below 45F
- aerate the lawn, reseed, and apply a winterizing fertilizer to promote its growth in spring
- dig up flower bulbs, label and store them in a bag or box with peat moss in a cool, dry place
- plant spring flower bulbs and lift bulbs that cannot winter over, such as dahlias, in areas where the ground freezes
- avoid pruning your trees and shrub in fall unless it is absolutely necessary (see our Trim Trees tip above)
- clean soil from planters
- bring pots made of clay or other fragile materials indoors
- lay terracotta pots on their sides in a wood carton to prevent swelling and cracking

More links on the same topic:
- Video – Winterizing Your garden
- Video – Gardening Tips & Tricks : How to Winterize Your Garden
- How to winterize your garden
- Winterizing Garden Beds
- The Cold, Hard Facts on Protecting Potted Plants
- Why You Should Stop Pruning Your Garden in the Fall
Outdoor accessories
Let’s take a look at what can be done for the outdoor amenities and accessories as well as the deck, driveways, and more around the home.
Take care of your outdoor kitchen
Cold temperatures, snow and ice can damage outdoor furniture and grills. If possible, store them inside, for example, in the garage or basement.
Your gas grill has a propane tank, close the tank valve and disconnect the tank first; it must be stored outside. If you don’t have storage room for your items, purchase covers to protect them from the elements. The covers you use in winter will be useful during the other seasons, too.

More links on the same topic:
Patio furniture
Clean and cover patio furniture or hide it in a shed or in the garage. Instead of regular covers, you can use shrink wrap to get better protection. Just keep in mind that you should do it while it’s still warm outside – the adhesive tape used in the wrapping does not work well in cold temperatures.
You have to be more careful if you are using any wooden outdoor furniture. Wrap it properly so that you can save your furniture from any damage.

More links on the same topic:
- How to Shrink Wrap Your Outdoor Furniture
- Winterizing Cast Aluminum Outdoor Patio Furniture
- How to Care For Teak Patio Furniture
- How to Properly Store Wicker Furniture in the Winter
Gazebo
Prepare your gazebo for winter. If you have a soft top gazebo, it is recommended to remove the canopy before harsh weather strikes. If your gazebo is a hardtop one, you can convert it into a shed by using a gazebo winter cover. Read this post from A Nest With A Yard to see what gazebo winter covers exist on the market and how to use them.

More links on the same topic:
- How to Winterize a Gazebo
- How To Prepare Soft Top Gazebo For Winter
- How To Convert Your Hardtop Gazebo Into A Winter Shed
Pergolas
If you have a pergola, you should remove any cover you installed on it during the summer. Then, you can convert it into a winter pavilion by installing a winter roof on the top. It can make it a perfect spot for winter BBQs! Think about adding infrared heaters; it will make your pergola even more enjoyable in winter.

Canopies And Tents
If in the summertime you used an outdoor canopy or tent in your backyard, don’t forget to disassemble it and store it away before the bad weather strikes.

Deck
If you have a wooden deck, clean leaves, dirt, and pine needles between the boards to suppress mold and mildew growth. If your deck needs it, consider giving it a fresh coat of sealer before winter. It will to prevent its deterioration over the winter.

More links on the same topic:
- 7 Ways to Prepare Your Deck for Winter
- How to Clean and Seal a Deck
- What Household Products Can I Use to Clean My Wood Deck?
Driveways and pavers
Your driveway and pavers should be winterized, too. Proper sealing before winter will help it to last longer since the sealing will prevent water from freezing in cracks and thus destroying your driveway. Also, It is important to take care of safety in winter and reduce the number of slippery areas around your house.
Make sure that you inspected walk off mats in walking areas and placed the ones that are missing. Also, check handrails on exterior stairs to make sure they’re well secured.

More links on the same topic:
- Homeowners: Do’s & Don’ts for Protecting Your Driveway This Winter
- Seal Coating Your Asphalt Driveway Before Winter
- How to Prepare Your Concrete Pavers for Winter
- Sealing Concrete In Cold Weather
- Railings for Winter
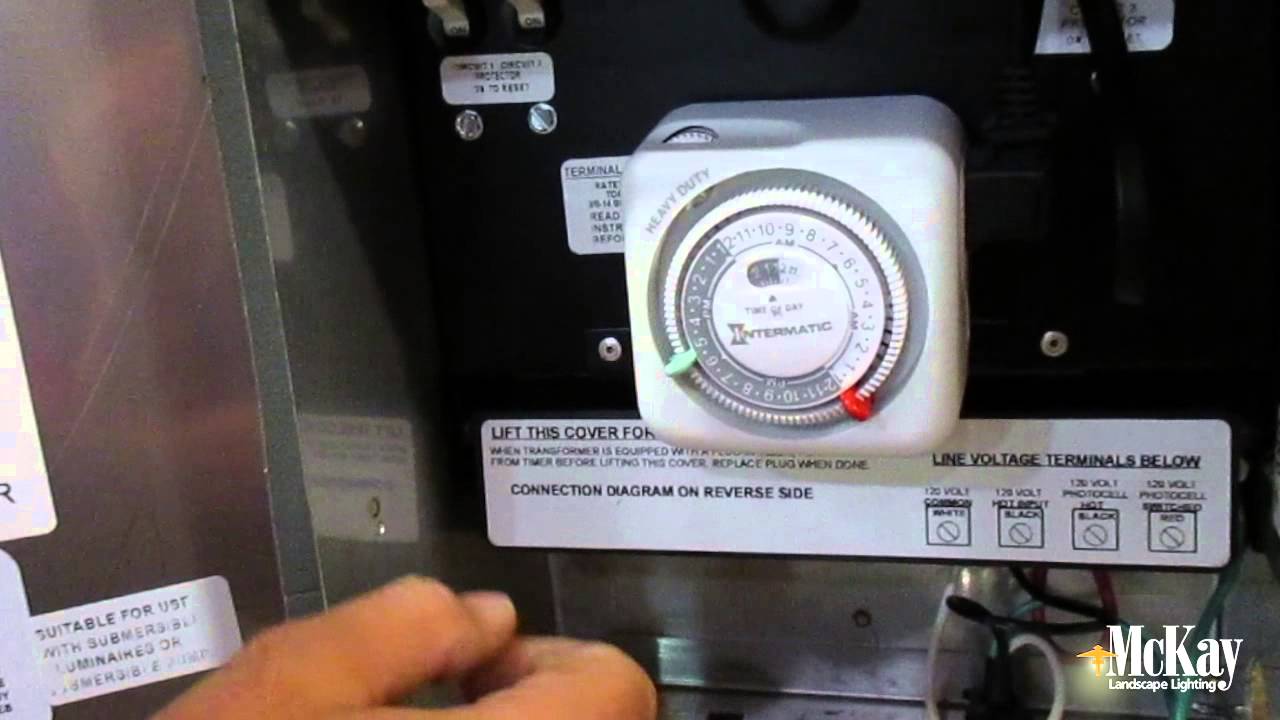
Outdoor lighting
Inspect outdoor lighting around the property.
Good illumination will help minimize the chance of accidents on slippery walkways at night. Be sure time clocks and other equipment is functioning properly for lighting and security systems. Don’t forget that the end of daylight savings will affect it as well.
To automate your outdoor lighting, you can also opt for motion sensor lights or light activated sensor lights.
More links on the same topic:
- How to Prepare Outdoor Lights for Winter
- Tips For Maintaining Your Landscape Lighting System This Winter
- LED Floodlights With Motion Sensors: The Ultimate Guide
- EverBrite Lighting And Its Alternatives Reviews
Off-season equipment
Take care of non-winter machinery and other equipment:
- clean, dry, and store summer gardening equipment inside, for example, in a shed or garage
- spray machinery and tools with lightweight oil to prevent rust
- weatherize your lawn mower by cleaning off mud, leaves, grass, and debris
- drain the gas from your lawn mower and other motorized tools, or just let it run until it is out of gas

More links on the same topic:
- Preparing Your Lawn Mower For Winter Storage
- How To Prepare Garden Tools For Winter
- How To Winterize Garden Tools
Do winterization yourself or hire a professional?
The majority of the simple winterizing projects can be done by you, the homeowner. However, for the larger or more extensive repair or maintenance projects, you may need to hire a professional. Here are some tips for hiring a home improvement contractor:
Consider doing the checks by a professional
Many utilities offer free annual checkups by qualified technicians. This is great but you should call early to schedule the check in advance of the high season. For example, HVAC crews tend to get a packed schedule when heating season starts.
Some furnace manufacturers and dealers also offer free or discounted inspections. You should also call them in advance!
The contractor must be registered
The contractor must be properly registered with the proper body or registry in your state. To find out what body is responsible for it, type “how to check if a contractor is registered <your state>” in Google search where <your state> should be replaced by the name of the state you live in.
Ask the contractor for references
Ask the contractor for at least three references and check to see if there are any complaints against the contractor. Again, you will need to find the body that is responsible in your state for monitoring the contractor complains. You may also want to check the complaint history with the Office of the Attorney General of your state and the Better Business Bureau.
Make a contract
Consider making a contract with your contractor no matter what is the price of your project.
Many states have a law that requires contractors to make a contract for a job over $1,000. However, the Office of Consumer Affairs and Business Regulation suggests that
[…] homeowners and contractors should consider having a contract for every job, regardless of the price.
In order to understand what to include in the contract, see this example list from the Office of Consumer Affairs and Business Regulation.
Be careful with paying upfront
It is recommended to pay no more than one-third of the cost of the contract upfront. You can make an exception and pay more in the case when special-order materials are needed to be ordered.
Applying for a government incentive? Read this
If you plan to apply for one of the incentive programs offered either by the federal government or local one, make sure you hire a suitable contractor. Many state and federal incentives require that the work be done by a certified contractor—so check the rules before hiring anyone. If you need to find an ENERGY START credentialed contractors, check the list on their page.
Prepare for emergency
And the last but not the least tip is to prepare for emergency. Did you know that FEMA recommends everyone to be prepared for emergencies?
That’s right. FEMA issued an In-depth Guide to Citizen Preparedness that is intended to be read by general public:
The guide has been designed to help the citizens of this nation learn how to protect themselves and their families against all types of hazards. It can be used as a reference source or as a step-by-step manual.
In winter, anything can happen and bad events will be only magnified by bad weather. To be fully prepared, consider assembling an emergency kit and preparing an emergency plan that will allow you to act calmly and safely in the case of unfortunate events.
Emergency kit
An emergency kit is also called a 72 hour kit since it is usually allows to survive for 3 days. Once prepared, you should store it in a dry and easy-to-access location.
Here’s some of the items your kit should include:
- first-aid kit
- extra bottled water
- nonperishable food supplies (including pet food, if you have a pet)
- indoor candles and matches or a lighter for use during a power outage
- blankets
- battery backup for your phone
Check the links below for more ideas what your emergency kit should have.

More links on the same topic:
Emergency plan
Often overlooked, it’s smart to prepare a plan in case of an emergency. One of the things I did at home when I was preparing such a plan for my family was writing down our emergency plan and letting everybody know where it was stored. Another thing I did was finding the phone numbers for our utility companies and put them in the Contacts section of my cell phone.
More links on the same topic:
- Make A Winter Emergency Plan With Your Family
- Create a Family Emergency Plan
- Lists of companies of the United States by industry
How To Winterize A House: Final words
After reading our ultimate guide, you now know what it takes to prepare your home for the season inside and outside! We tried to collect as much information as possible to make this article useful.
The subjects we covered included heating, pipes, roof, garden, backyard, and more! I hope you liked our ultimate guide about how to winterize a house. Let us know in the comments what you think! Also, share the guide on your social media!
Last winter, I followed these guidelines and managed to save a considerable amount on my heating bills. The step-by-step instructions for insulating windows and pipes were especially helpful and made the whole process much easier.
Being prepared for the winter is incredibly important for us northerners. Thanks for the info.
Thanks for the helpful knowledge. To heat the house, it is better to use a rocket stove. This furnace runs on solid, liquid, gaseous fuels and can perform functions without releasing harmful aerosols into the atmosphere:
– cooking on the stove and in the oven;
– heating of the heated floor with waste gases from the combustion of fuel;
– water heating in the boiler of a detachable stand-alone structure for the water heating circuit – underfloor heating, etc.
This guide is a great and loaded with information on how to winterize your house and it should be refereed to every year!
Thanks, Angelo! Glad you liked it!
Fantastic tips on how to prepare your home for winter. A must read for every homeowner. The tidbit about the federal tax credit was enlightening. Thanks for sharing!
it is so easy to forget about financial aid that a homeoner can get for winterizing. Myself, I am guilty of that. That’s why I placed this paragraph in the very beginning of the article.
Thanks for the comment, Donna!