Keep your patio furniture from blowing away with sandbag outdoor furniture weights you can buy on Amazon or make at home. You can also drill eye bolts into the deck and tie patio chairs to them with bungee cords. Use deck tie-downs if you don’t want to drill into floorboards.
Are you tired of running after your patio chairs every time it gets windy? Can’t think of a way to keep them in place after arranging a perfect designt sewing, you can sim?
I know exactly how to keep patio furniture from blowing away!
Simply follow my easy step-by-step anchoring tutorials provided below, and your outdoor sitting area will stay looking amazing, even in the wind. Check it out!
I don’t want to be chasing after my outdoor furniture, either. So, I took matters into my own hands and found a way to make patio furniture weights at home, for cheap.
This prompted me to write a complete guide for anchoring outdoor furniture. Without any further ado, let’s jump right into it!
Contents
- 1 Make Sandbag Patio Furniture Weights
- 2 Make Rice Outdoor Furniture Weights
- 3 Anchor Patio Furniture With Bungee Cords
- 4 Secure Outdoor Furniture With Deck Tie-Downs
- 5 Drill Patio Furniture To The Deck
- 6 Secure Patio Furniture With Earthquake Adhesive Gel
- 7 Secure Outdoor Sectional Sofa With Fasteners
- 8 Plant A Windbreak In Your Backyard
- 9 4 Additional Anchoring Solutions That Don’t Need A Tutorial
- 10 Patio Furniture Weights Are The Way To Go
- 11 About The Author
Make Sandbag Patio Furniture Weights
What You Will Need To Make Sandbags
- Old pair of pants
- Ziplock bags
- Play sand
- Sewing machine
- Scissors
- Measuring tape
Steps
Check out the steps on how to make a sandbag furniture weight for your patio:
- Cut The Pants To Size

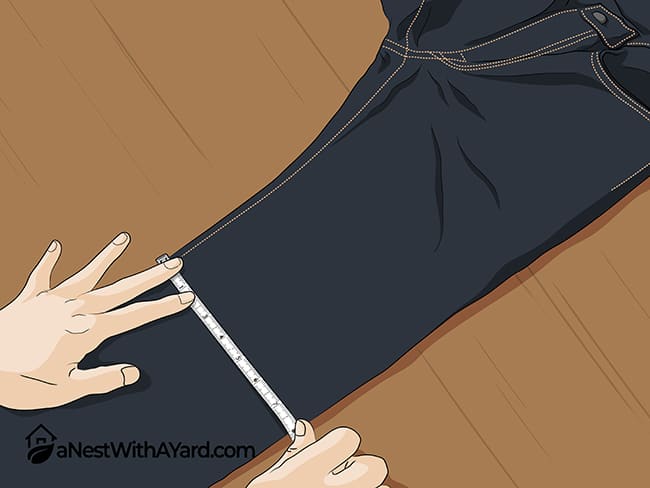
For this project, you will need a pair of old jeans or any other pants made of durable fabric.
First, measure 12 inches from the bottom hem of each pant leg and mark the measurement with a marker. Cut both pant legs at the 12-inch mark straight across, using sharp scissors.
You will make a sandbag out of each pant leg. You can cut the pant legs even longer to make bigger and heavier sandbags for your lightweight patio furniture. - Stitch Pant Legs In Half
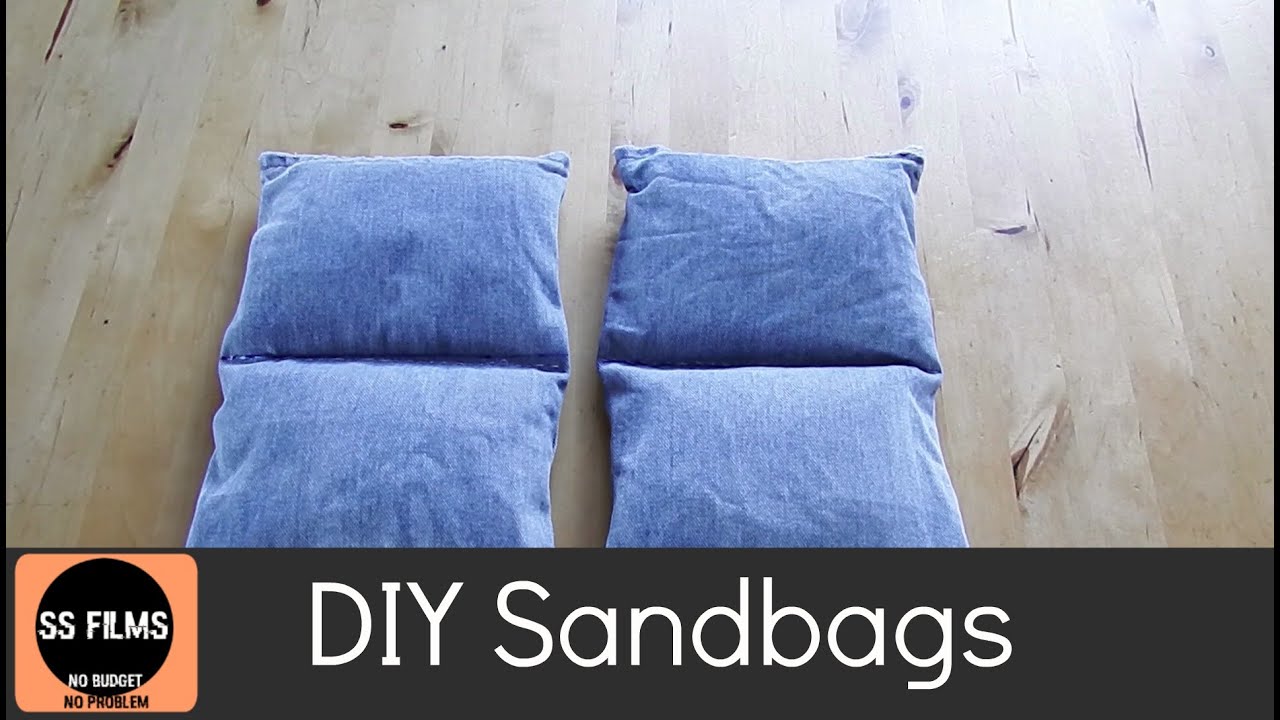
Now that you have both pant legs cut to the right size, you can divide them in half with a single stitch going across the width.
Measure half of the length of each pant leg and make a mark. If your pant leg measures 12 inches, the halfway mark should be at 6 inches.
Sew a straight line at the halfway mark to separate the pant leg into two pockets with openings at opposite sides. You can do this by hand or a with a sewing machine.
If you are not particularly good at sewing, you can simply buy empty sandbags that are already made.
But if you are feeling creative and you really want to stitch them yourself, you can watch the video guide below. - Fill The Zip Lock Bags With Sand
Fill four freezer-size ziplock bags with play sand or any home improvement store. You can even collect the sand from your local beach. Just make sure there aren’t any bugs inside:
Make each bag weigh 2 pounds using a kitchen scale. Don’t overfill the bags – otherwise, they won’t fit into the pockets you have sewn. Make sure you tightly seal the bags shut with some duct tape. - Sew The Pockets Closed
Put each ziplock bag filled with sand into its appointed jean pocket. Now, sew the openings closed.
You are done!
Use these inexpensive sandbags to weigh down the base of your patio dining table, chairs, and sun umbrella. You can also hang them from furniture if need be.
How To Stitch DIY Fill Sand Bags Video Guide
Use this video guide if you are planning on stitching the pants yourself:
Make Rice Outdoor Furniture Weights
What You Will Need To Make Rice Outdoor Furniture Weights
- Crew socks
- Knee-high stockings
- Rice or pebbles
- Shoelaces
Steps
Here’s how you can make rice outdoor furniture weights:
- Pick The Socks
The first step to making rice outdoor furniture weights is to pick the right-sized socks. I recommend you go for crew socks or any other type of long socks. You will fit more rice into them and make heavier weights, as a result.
Pick plain black socks if you want to keep your weights unnoticeable, or choose the colorful ones to add a pop of color to your backyard decor.
Pro Tip: You don’t have to buy new socks for this project. You can repurpose those old socks in the back of your drawer. Just make sure there aren’t any holes in them!
- Insert Stockings Into The Socks
Inert one knee-high stocking into each sock and leave an inch hanging out from the top.
The stockings will add another layer of protection to your outdoor weights. It will keep the rice from damaging the socks, over time and will make your weights last longer in the harsh outdoor conditions, as well.
- Fill The Stockings With Rice
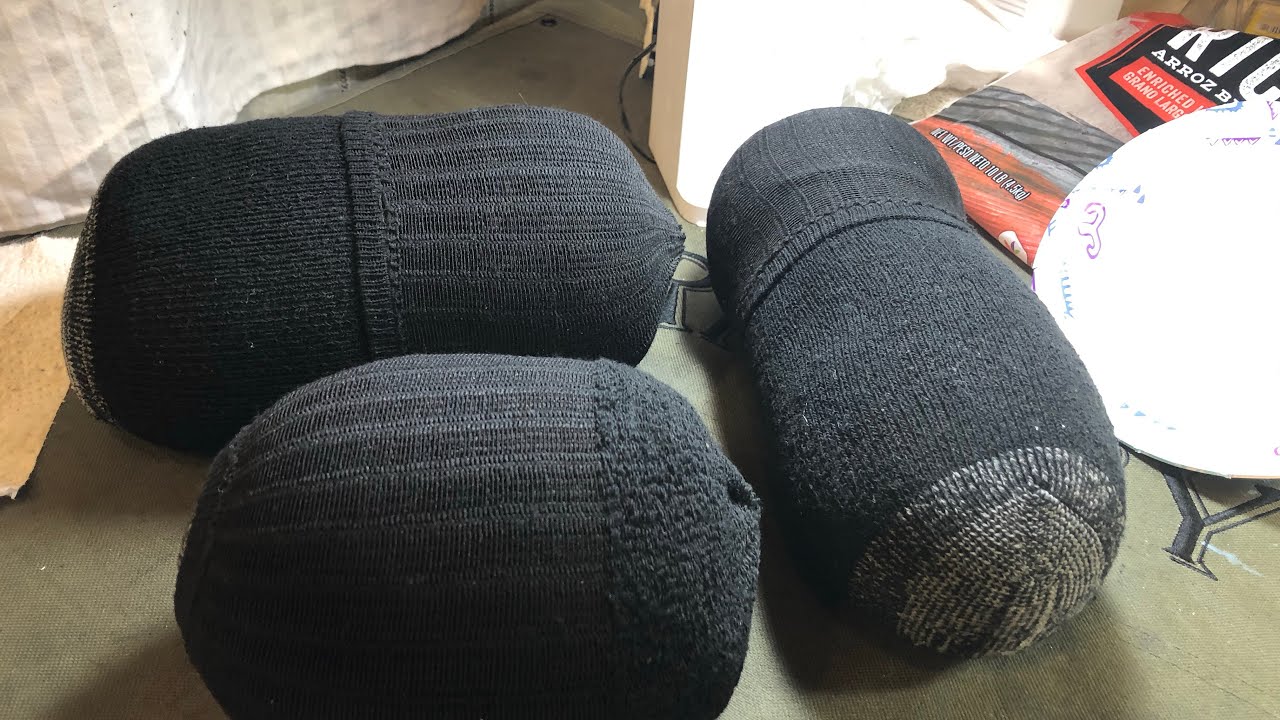
Fill each stocking with rice using a funnel or cut water bottle. Just be careful the stocking doesn’t slip out of the sock while filling it.
Make every sock weigh the same by using a kitchen scale. Don’t overfill them because you will have a hard time closing them later on.
Pro Tip: You don’t have to use rice to make your patio furniture weights. You can fill the socks with pebbles or any other weighty material instead.
- Tie The Knots
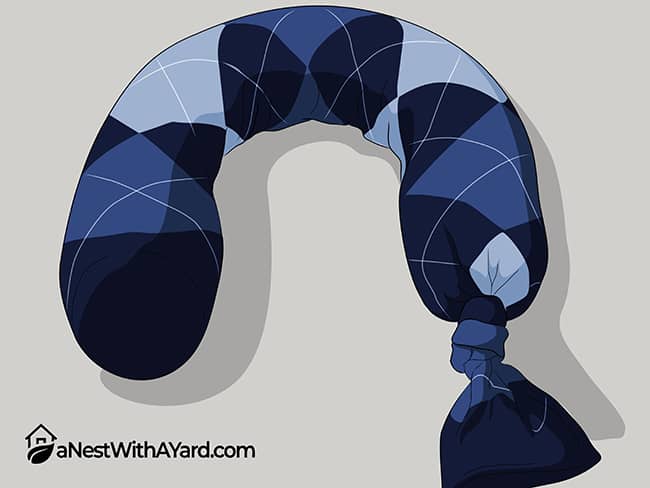
Push the rice to the bottom of the socks. Seal the deal and tie a knot in the stocking. Try to make the knot as low as you can. This way, the rice won’t move and make distracting noise when you move it.
Don’t forget to tie a knot in the sock, as well!
- Connect Weights With Shoelaces
Take a shoelace that is wider than the seat of your patio chair and tie it around the top of the sock where the knot is. Take the opposite end of that same shoelace and tie it to the other weight.
Remove the seat cushion from your patio chair, and place the shoelace across the seat. Let both weights hang from the sides of the chair. Put the cushion back on the patio chair to hide the shoelace.
You have successfully weighted your patio chair!
Pro Tip: If you don’t like how these sock weights look, you may like burlap pouches much better. Fill them with rice or pebbles and tie them shut. You can hang them from your patio chairs as is, or connect them with thicker jute rope, as explained in Step 4.
Anchor Patio Furniture With Bungee Cords
What You Will Need To Anchor Your Patio Furniture With Bungee Cords
- Ball bungee cords are done. No knots n
- D-ring anchors
- Wood screws or masonry screws
- Electric screwdriver
- Drill
Steps
Follow this step-by-step guide on how to secure your outdoor furniture with bungee cords:
- Position D-Rings
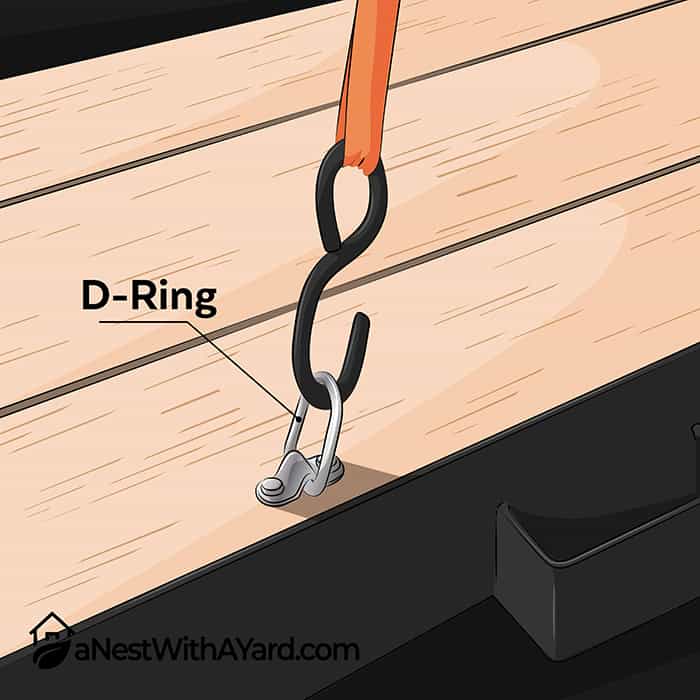
Decide where you want to install D-rings on your wooden or concrete patio pavers. Ring anchors should be placed near the base of the furniture you are trying to secure from the wind. Try to make the anchors as discreet, so they don’t ruin your outdoor design.
- Secure Ring Anchors To The Surface
Mark the drill holes through the brackets with a marker. Put the brackets aside for now and drill pilot holes where you’ve made the markings.
Align the brackets with the holes and screw them to the surface. Use wood screws on your wooden deck and masonry screws on concrete or paver patio.
- Tie Furniture With Bungee Cords
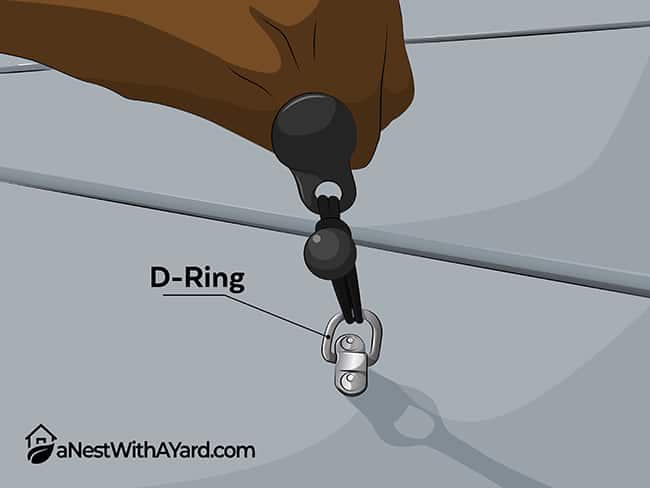
Wrap the bungee cord around the base of your patio chair and run it through the D-ring. Securely tie each patio chair to the deck.
I recommend you use these ball bungee cords that are quite easy to use. You simply push the ball through the loop, and you are done. No knots needed!
Bungee cords are a great and inexpensive alternative to outdoor furniture weights. They can keep your outdoor curtains from blowing in the wind, as well. Check it out!
Pro Tip: You don’t have to use D-rings to anchor your valuable patio furniture to the surface. You can use these eye bolts instead! They are very strong and durable. To install them, pre-drill pilot holes and twist the eye bolts in place. The only thing left to do is to tie the furniture to them.
Eye bolts come in a variety of shapes and sizes and can carry different loads. Take a look:

Secure Outdoor Furniture With Deck Tie-Downs
What You Will Need To Secure Outdoor Furniture With Deck Tie-Downs
- Deck tie-downs
- Zip ties or bungee cords
Steps
Here’s how you can secure your outdoor furniture using deck tie-downs:
- Wedge Tie-Downs Between Floorboards

- ⛺⛺【Strong Stability & Durable】-- Constructed from superior aluminum alloy + stainless steel material, not easy...
- ⛺⛺【Anti Slip & Adjustable】-- Come with spring buckle, which helps fix tent stakes better to prevent the ground...
- ⛺⛺【Easy To Set Up & Remove】-- Just insert it into the gap and rotate it to fix it when installing the tent on...
If you don’t like the idea of drilling anchor rings into your wooden deck, try using deck tie-downs instead! They won’t permanently damage your beautifully aged floorboards.
All you need to do is push the deck tie-downs in between the floorboards and lock them in place by twisting them 90°. The bottom is wide enough that it won’t slip through the crack between the boards.
- Tie The Patio Furniture
Run a zip tie or bungee cord through the hole in the tie-down and around the leg of your patio chair or table. You don’t have to fasten the zip tie all the way. You can leave it loose, so your patio chair will still have some mobility.
You can now sit back and relax, knowing that your furniture won’t fly away in the wind.
Drill Patio Furniture To The Deck
What You Will Need To Drill Patio Furniture To The Deck
- L brackets
- Wood or masonry screws
- Electric screwdriver
- Drill hammer
Steps
If you want to drill some patio furniture to your deck, here are the steps that you need to follow:
- Position The L Brackets
Decide where exactly you permanently want your wooden patio sofa and chairs on your patio. Lay the L brackets against the wooden legs of the furniture.
- Screw The Furniture In Place

Trace the drill holes through the L brackets onto the surface. This way, you will know exactly where to make the pilot holes.
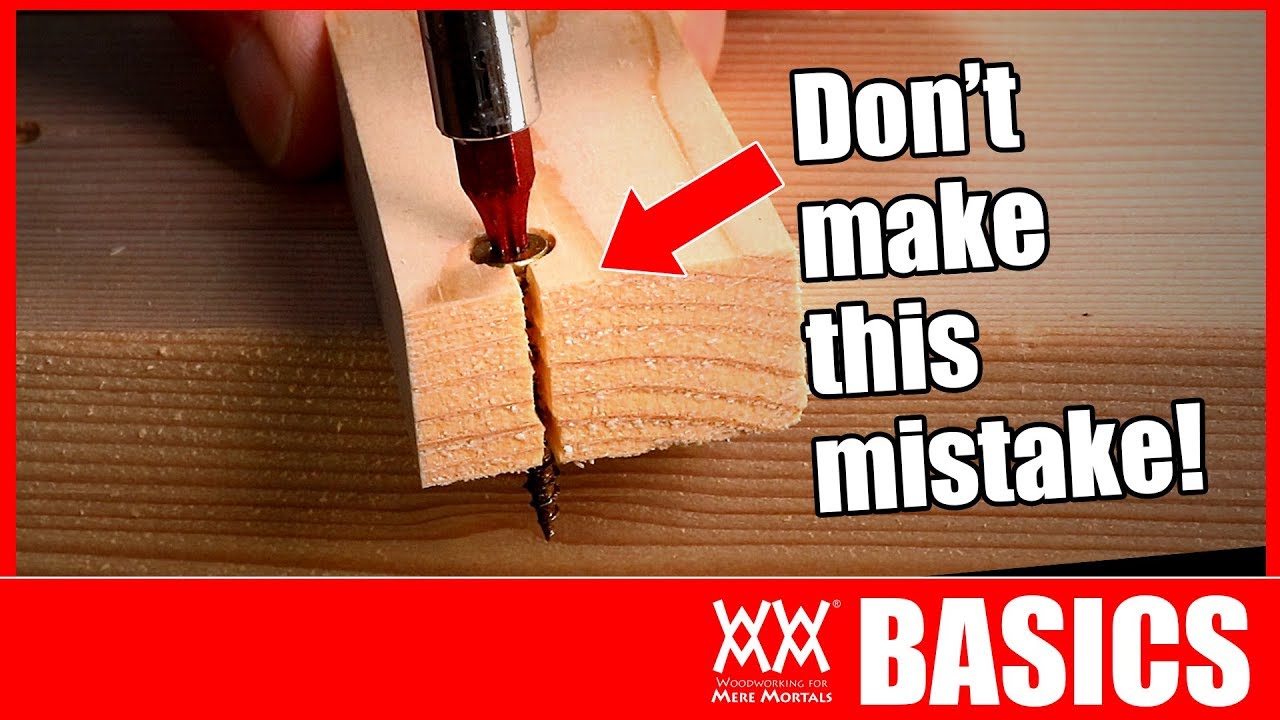
Pro tip: Mark the length of the screws on the drill bit with a piece of tape to know how deep to drill. You can now drill pilot holes at a 90°angle into the deck or concrete patio. Do the same with the wooden legs of the furniture.
By making pilot holes, you will reduce the chances of splitting the wood when driving in the screws.
Clean the dust out of the holes before screwing the L brackets in place using your trusty electric screwdriver.
Secure Patio Furniture With Earthquake Adhesive Gel
What You Will Need To Secure Patio Furniture With Earthquake Gel
- Clear QuakeHold! Gel
- Broom
Steps
If you want to use earthquake gel to secure the furniture on your patio, follow along:
- Sweep The Deck
QuakeHold! Gel is a clear adhesive gel used to hold valuable objects in place in case of an earthquake. QuakeHold! Gel is primarily used on glass and porcelain valuables, but you can use it on practically anything, even your patio furniture and outdoor rug!
For more ideas on how to keep your outdoor rug from blowing away, click here!
Pro Tip: Sweep the dust and dirt off the wooden deck or concrete patio before using the gel. This way, the gel will better stick to the surface.
- Glue The Patio Furniture

Apply the gel to the base of the outdoor furniture that easily gets swooped up by the wind. Press the furniture down to adhere it to the patio.
The good news is that the gel is easy to loosen and remove. Twist the chairs slightly to break the bond. You can reuse the gel for other projects of yours.
This ingenious product may need to be replaced every now and then, as it may lose its stickiness due to exposure to outdoor elements. Luckily, the gel is affordable and easily accessible.
Secure Outdoor Sectional Sofa With Fasteners
What You Will Need To Secure Your Outdoor Sectional Sofa
- Sectional sofa fasteners
Steps
Sucre your outdoor sectional sofa using fasteners by following these steps:
- Arrange Sectional Sofa
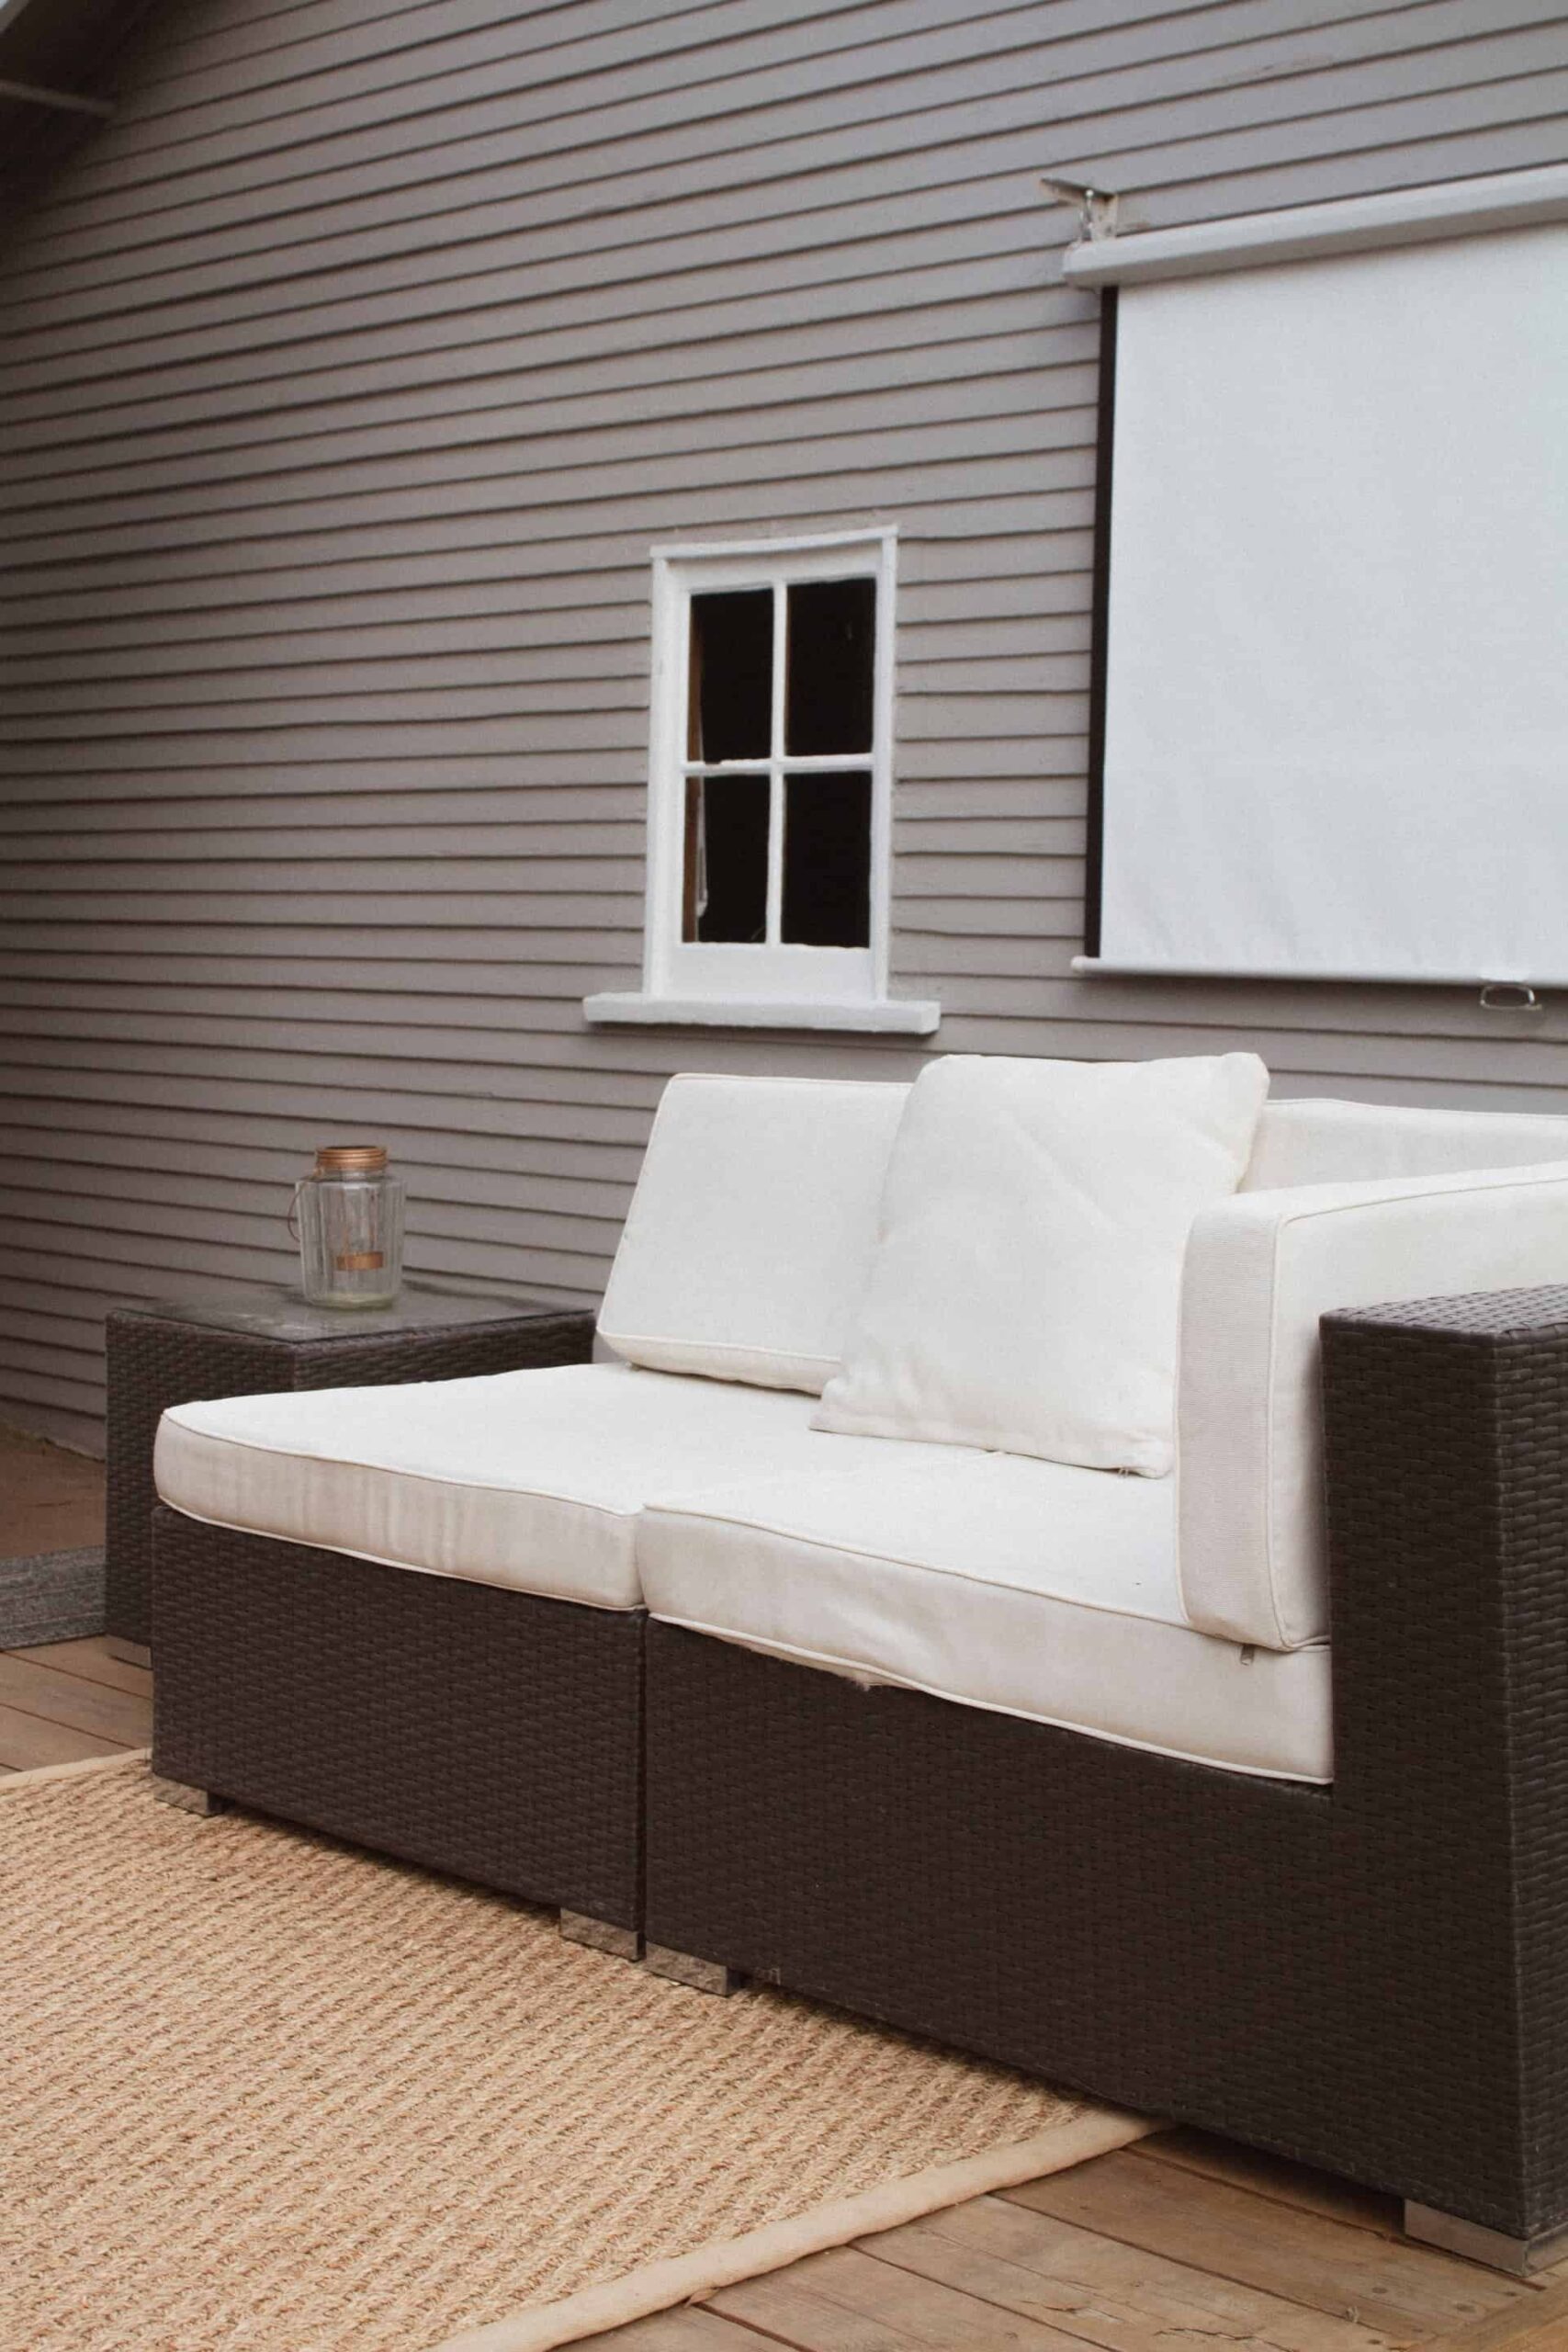
A sectional sofa is a great addition to any backyard. It will transform your boring patio into a cozy outdoor room, in an instant.
Sectional sofas are made of multiple individual pieces that can be arranged and rearranged in different configurations. So, take your time arranging your sofa just the way you like it before you connect sections into a single mass of furniture.
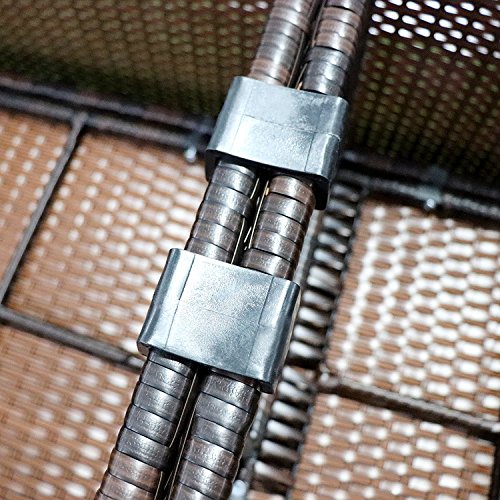
- Attach Sectional Sofa Fasteners
- 【PLEASE MEASURE SOFA TUBES DISTANCE 】Fits all Wisteria lane furniture and many other brands. please refer to...
- 【DIMENSIONS OF FURNITURE CLIPS】This type of fasteners is used for clipping two tubes with width 1.6 inches (=4cm)...
- 【PREVENT SOFA FROM MOVING】 These high quality fasteners prevents movement between modules to maintain the...
When individual pieces of the sectional sofa are not tied together, they are more likely to move and slide apart in strong winds.
To prevent that from happening, clip separate sofa parts with fasteners. If the clasps didn’t come with the product, you can buy them separately; just make sure you pick the right size for your sofa.
To attach the fasteners, push two sofa sections together and clip the closest bottom rails together, as shown in the picture above. This way, your sofa will be heavier and harder to move by strong winds.
Pro Tip: You can tie the sectional pieces together with zip ties instead. They work just as well as sofa fasteners.
Plant A Windbreak In Your Backyard
What You Will Need To Plant A Windbreak
- Emerald Green Arborvitae shrub or other large shrub
- Digging shovel
- Gardening gloves
- Mulch
Steps
Check out these steps on how to plant a windbreak in your backyard:
- Pick An Large, Upright Shrub
The best way to keep your outdoor furniture from blowing away long-term is by planting a windbreak in your backyard.
Your house, shed, trees, and fence may be creating a tunnel effect that amplifies the speed and force of the wind. A row of upright shrubs can step in the way of wind and keep your patio chairs from blowing away.
I particularly like the Emerald Green Arborvitae shrub that can be kept short or grown out to up to 60 feet tall.
- Determine The Direction Of The Wind
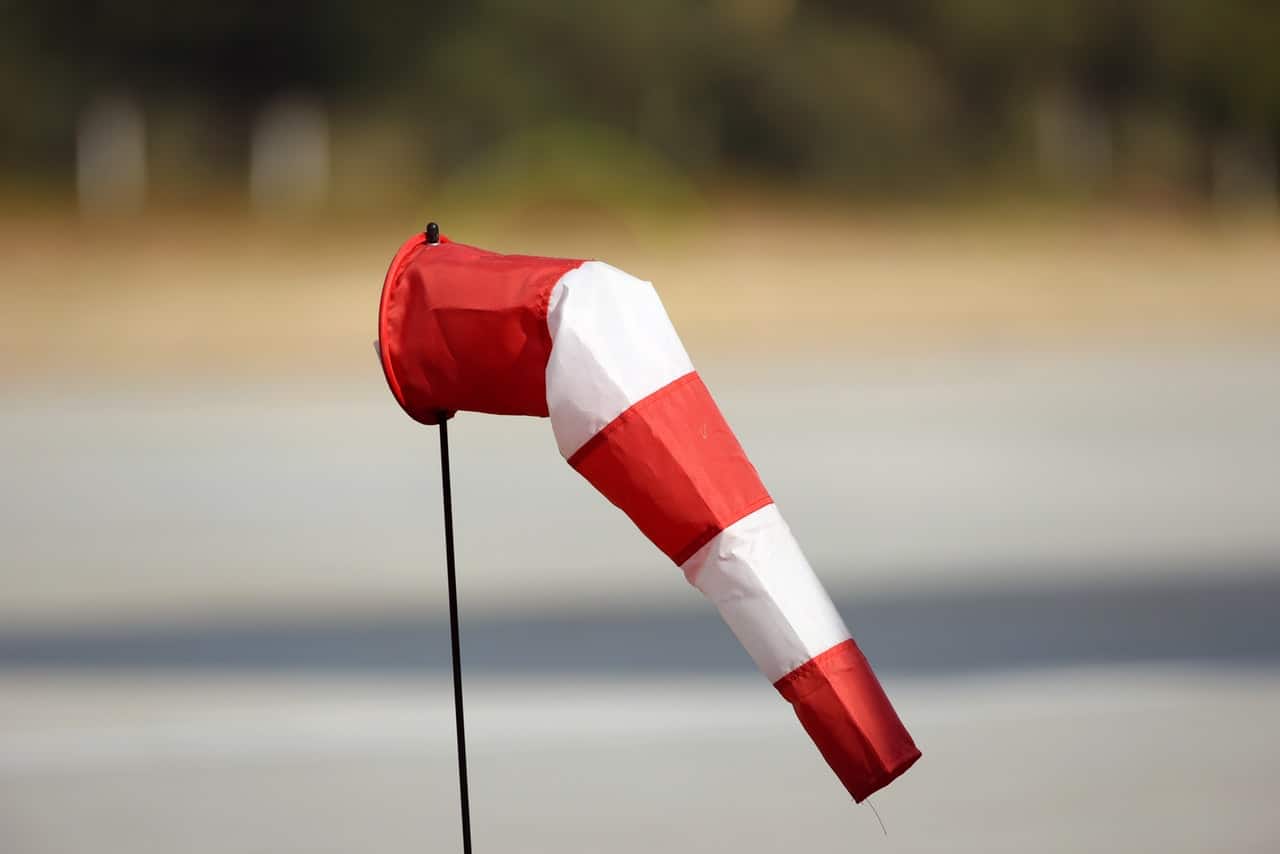
Determine the usual direction of the wind on your property with a windsock you can craft at home.
Once you have determined the general direction of the wind, decide where you want to plant your shrub wall. You can plant the shrubs on one side or all the way around your patio area. The plants will turn your patio into a small outdoor room with lots of privacy.
Take a look at the picture above for inspiration.
- Plant The Shrubs
Using a strong digging shovel, dig a planting trench or holes in a straight or curved row, as you planned. Emerald Green Arborvitae should be spaced at least 4 feet apart, center to center, or 3 feet apart if you are planting a privacy hedge.
Check the planting specification for other shrubs by clicking here.
Now carefully lower each shrub into its appointed hole and cover the roots with the soil. Water with plenty of water, and lay down mulch.
It may take a couple of seasons for your new barrier to grow strong, but the investment is worth it for the long term. Your new windbreak will most definitely improve your backyard living and curb appeal.
4 Additional Anchoring Solutions That Don’t Need A Tutorial
I have established that there are lots of simple ways to keep your patio furniture from blowing away. Here are 4 additional anchoring solutions that don’t need a tutorial:
- Keep patio chairs stacked when not in use.
- Keep the furniture in place with furniture covers.
- Invest in patio furniture made of heavy materials, like wrought iron, steel, acacia, and teak, while staying away from aluminum and PVC. This same method will keep your flag from wrapping around a pole, as well.
- Secure outdoor cushions with adhesive Velcro straps.
Patio Furniture Weights Are The Way To Go
Collecting patio chairs from all corners of your backyard after every stormy night gets tiresome after a while. Witnessing your furniture get damaged is not fun either. Scratched, muddy, and beat-up chairs are not the aesthetic we are after.
I’ve always been an advocate of working smart over hard. I don’t want to chase after my outdoor furniture, and neither should you! Using patio furniture weights is just one of many ways you can keep your outdoor furniture from blowing away.
Do you agree? Let me know in the comments below and share my tutorials on your social media, as well. Your friends might be looking for the same outdoor furniture anchoring solutions as you are.
About The Author
Last update on 2024-04-25 at 05:54 / Affiliate links / Images from Amazon Product Advertising API