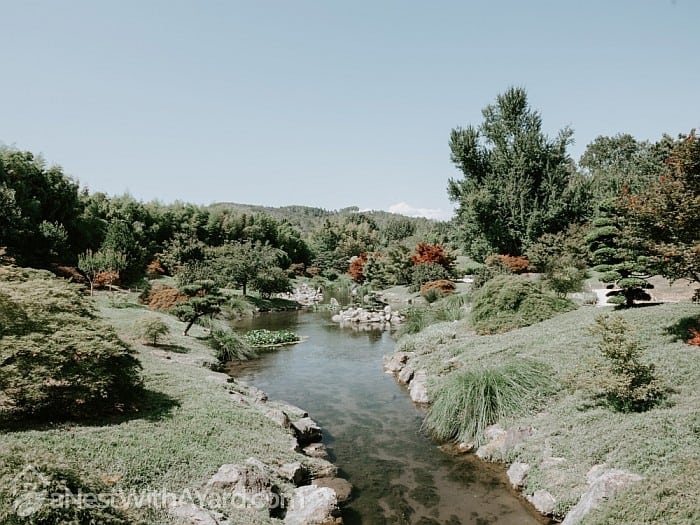
Building a berm in your garden could be just what you need if you’re suffering from poor drainage. It’s also one of the easiest ways to make your garden more aesthetically pleasing. Take a look at this beautiful garden – I definitely think that the use of berms is the key to its beauty.
If you’re wondering about how to build a berm to divert water, keep reading to find out how to go about it step by step.
Contents
What Is A Berm? How About A Rain Garden?
Using berms in your garden is pretty much a life hack, in my opinion. It’s such a simple method to improve both the functionality and appearance of your lawn. Who would’ve ever thought that a mere mound of soil could produce such amazing benefits?

But before we get started with the steps of building a berm, let’s get into what a berm actually is and what it can be used for.
A berm is a round-shaped mound of fill that’s built on a leveled area. What distinguishes a berm from a raised bed is its shape. A raised bed is generally rectangular-shaped and has a flat surface whereas a berm is sloped and rounded.
Berms have been used by landscapers for ages to improve water drainage. They’re great because they allow a stream or flow of water to break at the point at which it reaches the berm and diverts it around it. This prevents any build-up of water, and thus, any ruin.
While we’re on the topic of water drainage, I thought I should mention another great way to improve drainage: rain gardens. A rain garden helps you reduce run-off from your property. Basically, an effective rain garden could be another option to consider if you’re hesitant about building a berm because you’ll be achieving improved drainage either way.
A rain garden, also known as a bioretention facility, is best described as a depressed area that collects rainwater and allows it to soak into the ground. It works for rainwater from any area of your yard, such as from the roof, driveway or street.
Rain gardens are basically designed to treat polluted stormwater runoff and are typically planted with grasses and flowering perennials. How beautiful is this rain garden below? Both are functional and very nice to look at!

Okay, back to our berms! Their use doesn’t end at just being a drainage solution. They’re also great for making your garden look aesthetically pleasing, separating areas of the garden, accenting walkways, and as foundations for privacy screens.
I think it goes without saying that berms really are versatile in nature.
Build Your Own Berm – A Step-By-Step Guide
I love gardening, but I’m sure you’ll agree with me when I say that convenience and time-efficiency are what I look for when trying out any gardening practice!
For this reason, I’ve selected both some must-have and optional tools that will help make building a berm easy-peasy.
What You Will Need
Must-haves:
- Fill material, such as sand, plant debris, rubble, or asphalt and soil.
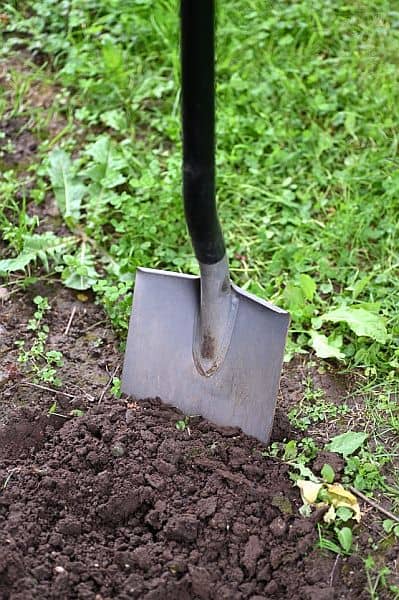
- Spade or shovel
- Hose pipe
- Tamping tool
Nice-to-haves:
- Wheelbarrow
- Gardening gloves
- Measuring tape to perfect your berm’s height and width
- Rake
- Topsoil
- Flower plants
- Grass seeds
- Mulch
Steps
Now we’re getting to the good stuff. Before reading on, it’s important to have a good understanding of why you’re building a berm. Is it because you’d like to improve your garden’s drainage? Or maybe you’re just working on its aesthetics and would like to add a little height?
Why is this important? If you’re building a berm for drainage purposes, the steps are a little different from those that you’d ideally need to follow if you’re just working towards an aesthetic purpose.
Building a berm to divert water in your yard requires careful planning around the areas where you’ve noticed water build-up or damage.
- Design Your Berm
Firstly, you’ll need to design your berm. Think about factors like your garden’s drainage patterns, your height and width preference, and the purpose of your berm.
For drainage relief, your berm should be built in the spot where you’ve noticed water standing or flooding when it’s rained. If your berm is for aesthetics, you can build it pretty much anywhere you like.
Your berm should be 4-5 times as wide as it is high. This will give you a good starting point to work from when you consider how much space you have and what would suit your garden best.
- Outline The Shape Of Your Berm

You’ve completed your berm design and are ready to put that spade to work. Your first step is to outline the desired shape of your berm. You can do this by edging around the area with your spade to clearly define and demarcate it.
Once you’ve outlined the area, dig up any grass growing within your outline. Make sure you have a cleaned-out surface so that your berm has a strong foundation to rest on.
Now that you’ve cleared out your base, use your spade to tamp on the area to pack in the newly loosened soil. - Time To Fill It Up
Use your spade or shovel to pile on the fill. The key to this step is to do it in layers so that your berm is sturdy and can withhold the weight as you keep on piling.
Don’t layer your fill high or start from left to right or vice versa. Rather pile some of the fill in the middle and use your shovel to spread it close to the edges of your outlined area. Don’t go all the way to the edge because you’ll need some space for topsoil. Make sure you tamp each layer as you go. - How To Create A Good Slope For Your Berm?
Once you’ve added about 2 or 3 short layers of fill, it’s time to develop the slope. The key to this step is to create a gradual slope. You can do this by adding on narrow layers as you get to the top.
To make your berm look more natural, you can shape it to look more curved or crescent-shaped. Keeping the peak of your berm towards one side of it, as opposed to in the center, will also add to a more natural appearance.
Remember to keep tamping after each layer so that your berm doesn’t collapse! - Making Your Berm Look Pretty

Now that you’ve got a nice solid mound of fill, your berm will need help blending in with your garden.
Are you planning on covering it with grass? Or flowers and shrubs? If you’re going with the latter, flowers and shrubs that are mostly evergreen or drought-resistant will grow the best on your berm.
Plants that are drought-resistant grow really well on slopes so you won’t have to stress too much about whether or not they’re receiving sufficient water.
Your bigger plants or trees should be planted first right at the top of your berm, and then your smaller ones around it.


Pro Tips
- Spritz some water over each layer of fill to get rid of air bubbles that may have formed as you filled.
- Opting for a height of maximum 2 feet is best. Going higher than 2 feet will be tricky as it will weaken the berm.
- When deciding the height and width of your berm, aim for a 5:1 ratio (expand the base 5 feet out for every 1 foot of height).
- A gradual slope will give your berm a natural look and it is also great for preventing erosion.
FAQs
What is a water berm?
A water berm is a raised bed, also known as a mounded hill of soil, that’s created to relieve standing water and to redirect it elsewhere, such as swales or drains. Water berms may be used for several purposes, such as for accenting walkways and separating areas of your garden.
Will a berm stop water?
A berm will stop water from reaching areas of your yard that you’d like to keep dry. The main aim of a berm is to divert water run-off around anything in your garden that you wish to protect. It does this by redirecting the flow of water to other areas.
Can a neighbor drain water onto your property?
A neighbor can drain water onto your property if it doesn’t cause substantial harm. Some countries have legislation that dictates you may take legal action against your neighbor for draining water onto your property only if their unreasonable or careless actions with water have harmed your property substantially.
And That’s How To Build A Berm To Divert Water In Your Yard!
Easy, right? The simplicity of the idea behind berms really fascinates me! Say goodbye to standing water ruining your pretty plants or being a menace to your garden with just a mound of fill? Sounds a little too good to be true right?
The best part about berms is that you’re basically killing two birds with one stone: a drainage solution plus a heightened feature to your garden.
If you’re considering building a berm, what did you think about my tutorial? I hope you find it useful. I’d love to hear what you think!
Thank you for the information. Wonderful! I loved the bold print: fast and understandable reading. Well done.
I have water issues and want to tackle the problem with a combo of Berm(s), Rain Garden, Swale(s) and/or a Dry Bed. Here’s a Question:
My yard measures 80’L x 70’W: My long term goal is to have privacy and wind protection Hedges around the fenced perimeters (left and right sides and the back). I have 10′ to 12′ to play with around the perimeters from the fencing for hedging. Hypothetically, lets say the mature hedges will be about 5′ to 10′ wide, this will yield a total of 8 hedges for the sides (10′ hedge/80′ long yard = 8 hedges. and 10′ hedges for the rear of the yard, 70′ wide = 7 hedges). Now, The rain garden will occupy possible 10 to 30 feet in front of the last 10′ of the rear yard, or put in another way, the rain garden will be in front of the rear hedges. Now, I read the berm of a rain garden is usually made Behind the rain garden, but how will this berm effect the hedges that will be beyond this point? Should I plant the hedges onto a mound/berm and connect that berm to the rear of the rain garden? Or should I have the hedges on flat ground? Note: I have a neighbor in the back and I get water from their lawn and water from the neighbor to the left. The water I get from the rear neighbor comes into the last 10′ of my yard (where the hedges will be), so how I solve this problem? Thanks