How you fix a leaky garden hose depends on where the leak is coming from. Replace the hose gasket if it is coming from the connector. If the tear is in the middle of the pipe, use a hose mender to fix the leak. A leaky hose bib can be fixed with a simple twist of the packing nut.
The hose you see in the picture above used to be a leaky mess. Now, it’s like a brand new hose! You, too, can get the same results by following my step-by-step tutorials on how to fix a leaky hose!
We are quick to throw broken things away without ever trying to repair them. I am learning to give my old gardening tools a second chance in life by fixing them!
This prompted me to write a complete guide on how to fix a leaky hose, no matter where the leak is coming from. I can’t wait to share my tips with you!
In case you can’t fix your hose, you can always buy the best no-kink garden hose from my review list. Without further ado, let’s jump right into the first tutorial!
Contents
How To Fix Leaking Garden Hose Connector
Replace Hose Gasket
What You Will Need
- O-ring hose gasket aka washer
- Flathead screwdriver or needle-nose pliers
Steps
Here are the steps on how to fix a leaking garden hose by replacing the hose gasket:
- Disconnect The Hose

The first thing you need to do is turn off the water and disconnect the hose from the faucet or a nozzle, depending on which end of the hose you are fixing.
The number one reason why garden hoses start leaking from the end fittings is a faulty or missing gasket. Gaskets wear out due to water pressure and need to be replaced every 3 to 10 years.
It is also not uncommon for a gasket to fall off the hose without noticing it. Once you detach the hose, see if the gasket is even there. - Remove The Old Gasket

If your garden hose is not missing a gasket, you can carefully pull the old one out using a flathead screwdriver or needle-nose pliers. - Insert The New Gasket
Use your fingers to push a new O-ring gasket into the opening. Push it deep enough so that it is snug and secure. If the gasket falls out of the hose, you either have to push it in more, or you are using a gasket that is too small. - Reconnect The Hose

All that is left to do is reconnect the hose on the faucet or nozzle. Turn on the water and check for any leaks. If the hose is still leaking, you will need to replace the connector.


Replace The Leaky Hose Connector
What You Will Need
- Hose connector
- Garden shears or scissors
- Hose clamp
Steps
Here’s how you can properly replace a leaky hose connector:
- Buy The Correct ConnectorReplace Hose Gasket

The first step to changing the hose connector is buying the right one. Depending on which end of the hose you are fixing, you will either have to buy a male or female coupling. Female connects to the faucet, while male connects to the sprinkler or a nozzle.
You also need to consider the size of your hose. The connector should have the same diameter as the hose. Get a ⅝-inch connector for a ⅝-inch hose.
- Cut Off The Old Connector

Get yourself a pair of sharp garden shears or scissors. Use my review list to find the best garden shears for you! Cut the leaky connector off the hose one inch away from it. Get as straight and as even of a cut as possible. You can lay the hose on the ground to achieve precision while cutting.
- Slide On The Hose Clamp

Once you have cut off the old connector, you can slide the hose clamp onto the hosepipe. Expand the hose clamp by turning the screw counterclockwise. Make it big enough so it can easily slide on the hose.
Hold the hose clamp in the place where you have made the fresh cut.
- Insert A New Connector

Hold the hose tightly with one hand and insert a new connector into the opening using another. Push it down, so only the male or female threads remain exposed.
- Fasten The Hose Clamp
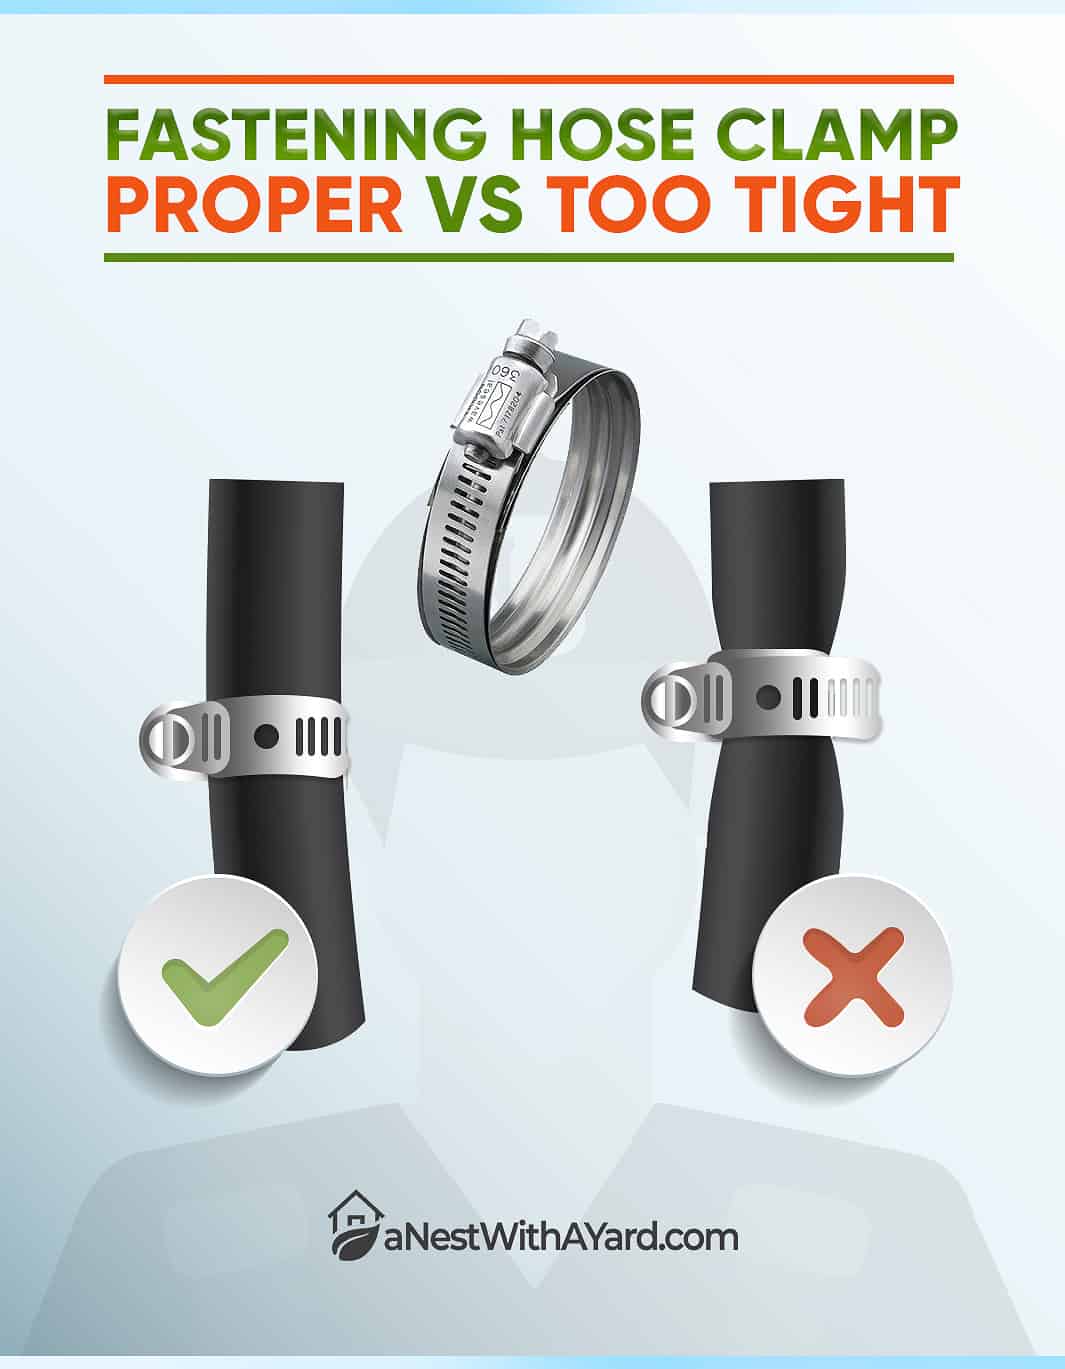
The last thing you need to do is fasten the hose clamp to hold the connector in place.
Push the hose clamp to the top and tighten it, turning the screw clockwise. Fasten it enough to make the connection waterproof but not too much to damage the hose.
Watch this video for a complete tutorial:

How To Fix A Garden Hose Leaking From The Faucet
Tighten The Packing Nut
What You Will Need
- Wrench
- Thread seal tape
Steps
If the leak is coming from the faucet, here’s how you can fix it:
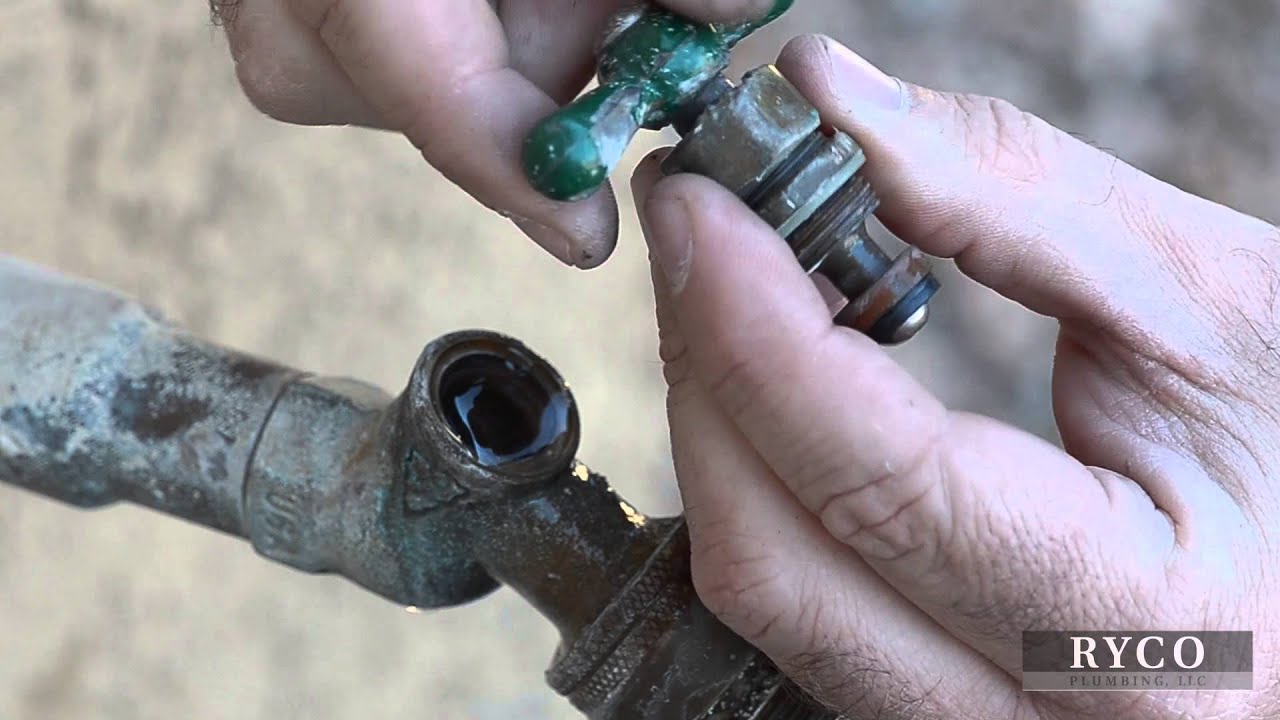
- Tighten The Packing Nut

Tighten the packing nut with the wrench by turning it clockwise. The packing nut on the hose bib is located right under the handle, as shown in the picture above.
Turn the water on to see if this simple remedy fixed the leakage coming right under the handle. If the hose bib is still leaking, you will have to use thread seal tape, as well.
.
- Wrap Thread Seal Tape (If Needed)
Unscrew the packing nut once more and wrap eight inches of thread seal tape around the threads.
Thread seal tape is also called plumber’s tape or Teflon tape. It helps create a tighter seal between pipe threads, bolts, and nuts. Screw the packing nut back in place. You are all done!
Replace The Hose Bib Washer
What You Will Need
- Hose bib washer
- Wrench
- Screwdriver
Steps
Here is the step-by-step guide on how to replace the hose bib washer:
- Release Pressure From The Hose
The first thing you need to do is release the pressure from the hose, so that the water left inside doesn’t spray you when you remove the top part of the hose bib.
Turn off the water valve and open the faucet to let any remaining water out. That’s it! You are now ready for the next step.
- Take Off Hose The Bib Stem

Remove the stem of the hose bib by twisting the removal nut counterclockwise, using a wrench. Take it off completely to expose the old washer located underneath.
- Replace The Washer
The old washer will be secured onto the stem with a screw. Remove it using a screwdriver. Place this screw in a secure place, so you don’t lose it.
You can now take out the old washer with your fingers. It should pop right out of the groove. Insert a new washer into the appointed place. It should snap right inside of the indent. Secure the new washer with the same screw.
- Put The Stem Back On
Now that you have changed the washer, you can screw the stem back into place. You can watch this video to learn how to fix a leaky hose bib.
How To Fix A Small Hole In Your Garden Hose
Seal The Hole With Electrical Tape
What You Will Need
- Electrical tape
- Scissors
- Marker
- Dry rag
Steps
If the leak is coming from a small hole from your hose, this is how to patch it up:
- Locate The Pinhole

The hardest part of fixing a pinhole in the hose may be finding it. The easiest way to do this is to turn on the water and look for a small geyser-like stream of water coming from the tube.
Mark the section where the pinhole is located with a marker. This way, you won’t lose its whereabouts once you turn off the water.
- Dry The Section

Take a dry rag and dry the punctured section of the hose thoroughly. If you see any dirt, remove it as well. This will ensure the electrical tape sticks to the hose property and doesn’t peel off.
- Seal Pinhole With Electrical Tape

You can now finally seal the pinhole with electrical tape by wrapping it around the marked section a couple of times. Don’t wrap it too tightly, as you may restrict the water flow.
All that’s left to do is turn on the water and check for any drippage.
Fix Bigger Holes With A Hose Mender Kit
What You Will Need
- Hose mender kit
- Garden shears
- Hot water
Steps
Here are the steps on how to fix a big hole with a hose mender kit:or missing gask
- Buy A Hose Mender

There are different types of hose mender kits available on the market. Some fix a leak at the end of the hose, and others fix it in the middle of the tube.
If you don’t find a hose mender that is specifically designed to fix a leak in the middle, you may have to buy a female and male hose mender and screw them together.
Lastly, make sure you buy the correct size. The diameter of the hose mender should correspond with the diameter of the hose.
- Cut Out The Damaged Section

Use sharp garden shears to cut out the damaged section of the hose. Cut as straight as you can, so there won’t be any gaps between the pipe and the mender once you install it.
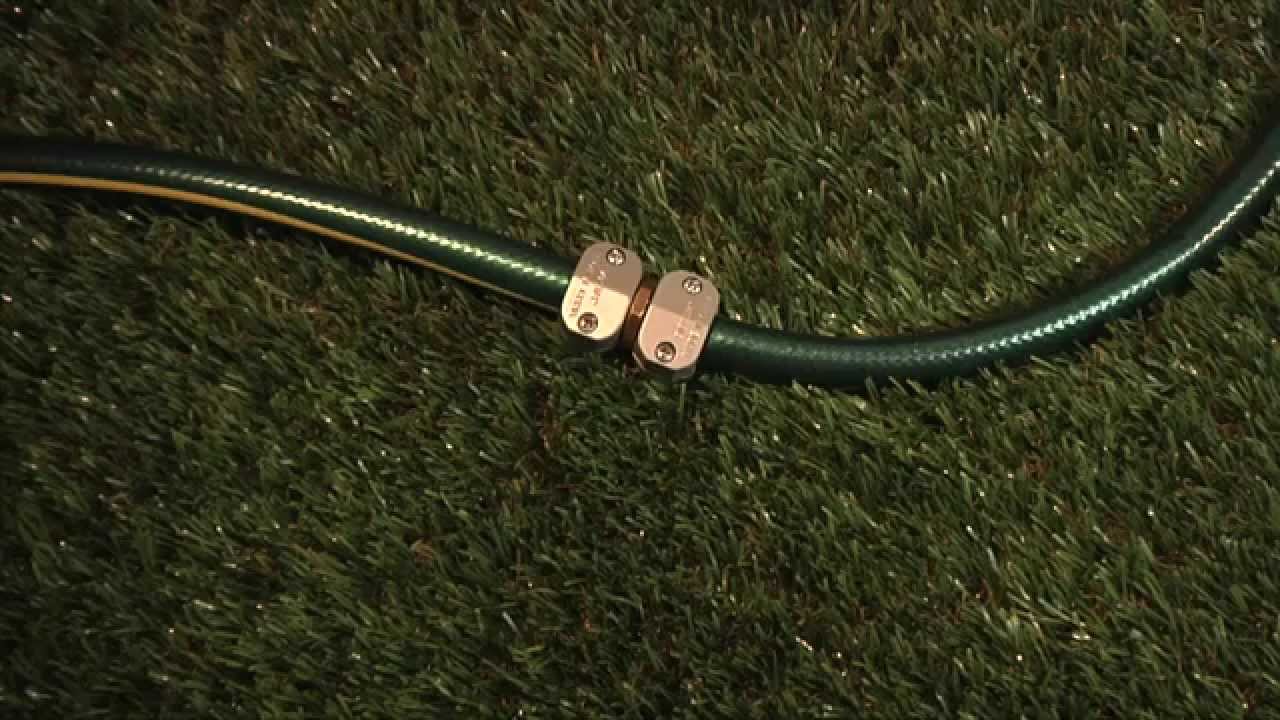
- Install Hose Mender

A hose mender kit will include a metal connector and two hose clamps. Insert the metal connector onto each end of the cut hose. If you are having trouble pushing the connector in the hose, you can soak the opening in hot water for a couple of minutes to make it malleable.
Secure both sides of the hose in place using the hose clips included in the package. Tighten the hose clips around the very top of the hose where the newly installed connector is located.
Here’s a video on how to properly install a hose mender:
FAQ
Why is my hose connection leaking?
Your hose connection is leaking because of a worn-out hose gasket. You need to take the hose off the faucet or remove the sprinkler. Replace the old or missing gasket with a new one. If the leak is still there, you will need to replace the connector in its entirety.
Can you tape a leaky hose?
You can tape pinholes on a leaky hose. Locate a pinhole and wrap electrical tape around it. This should solve the problem. For bigger tears, you will need to use a hose mender.
What tape stops leaks?
A silicone tape or waterproof PVC tape with strong adhesive should stop water leaks. Electrical tape can stop pinholes in a garden hose, as well. There are many types of tapes on the market that stop leaks, one of the popular ones being Gorilla Waterproof Patch & Seal.
Will duct tape stop water leak?
Duct tape will temporarily stop water leaks until the plumber comes. It is a temporary fix, not a permanent solution. Silicone tape works better. It will form a more reliable temporary waterproof seal around a leaking pipe.
That’s How To Fix A Leaky Hose
See! If you want to fix a leaky hose, it isn’t that difficult. You will feel a sense of accomplishment once you do it. Not to mention how much money you will save on buying a new garden hose!
I enjoy giving my belongings a second chance in life. That is the main reason why I wanted to share these tutorials with you – to encourage you to do the same.
Did you find my tutorials on how to fix a leaky hose helpful? Let me know in the comments below, and feel free to share my tips on social media.
About The Author
Last update on 2024-04-26 at 03:40 / Affiliate links / Images from Amazon Product Advertising API